| Hoşgeldin, Ziyaretçi |
Sitemize gönderi yapmadan önce kayıt olmanız gerekmektedir.
|
| Çevrimiçi Kullanıcılar |
Şu anda 458 çevrimiçi kullanıcı bulunmaktadır.
» 6 Üye | 447 Ziyaretçi
Applebot, Baidu, Bing, Facebook, Google, afkspin-swalp, nvcasinologin83-Insuppy, olimpkazino-Inhible, quickzdemo-incils, review-Bluetaw, slot-swEenia
|
|
|
| A Player's Guide to Surviving Groal the Great in Hollow Knight: Silksong |
|
Gönderen: xtameembb - 22-08-2026, 23:39:31 - Forum: İlim
- Yanıt Yok
|
 |
Every player who descends into the Bilewater region of Pharloom eventually learns a simple truth: Groal the Great is less a test of skill and more a test of stubbornness. The journey to his arena is long. The maggot water stings. The minions waste time. And then the giant frog-like boss lands, deals two masks of damage with a single hit, and forces even the calmest wanderer to reconsider every life choice that led them there. In 2026, after countless updates and community experiments, the fight still feels like a cruel joke told by the depths of Bilewater. But there is a way through it.
Finding the Fight and the Hidden Bench
Groal the Great is located in the Bilewater region, one of the most painful places to explore in all of Pharloom. A player who approaches from the Putrified Ducts gets two immediate advantages: a much shorter run back after every death and a chance to find the Wreath of Purity, which temporarily protects against the downsides of maggot water. That item alone changes the rhythm of the Groal fight.
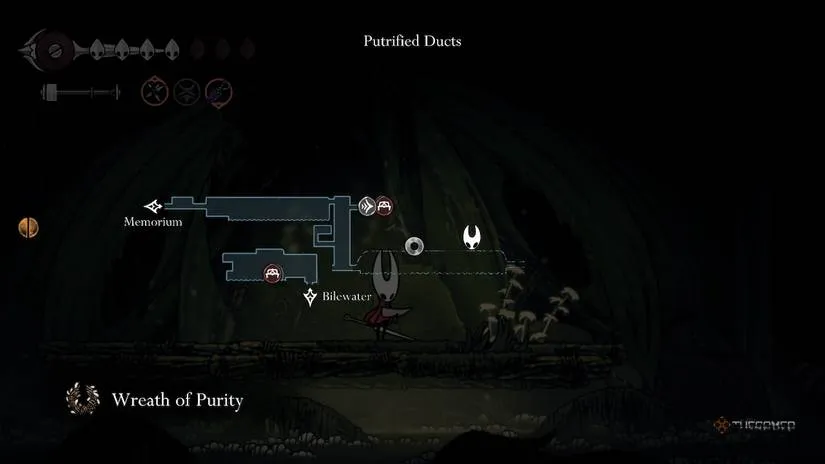
Many players, however, stumble into Bilewater from the southern entrance before they know better. For those stubborn wanderers, the most important task is to unlock the hidden bench. The route is not obvious, but it saves an enormous amount of time.
Continue up Bilewater until a right-hand corridor opens.
Move through that corridor into the next room.
On the far right side of the room, drop into the corner until a hidden path leads into a vat of maggots.
Swim right.
Fall into the narrow tunnel that drops down to the bench.
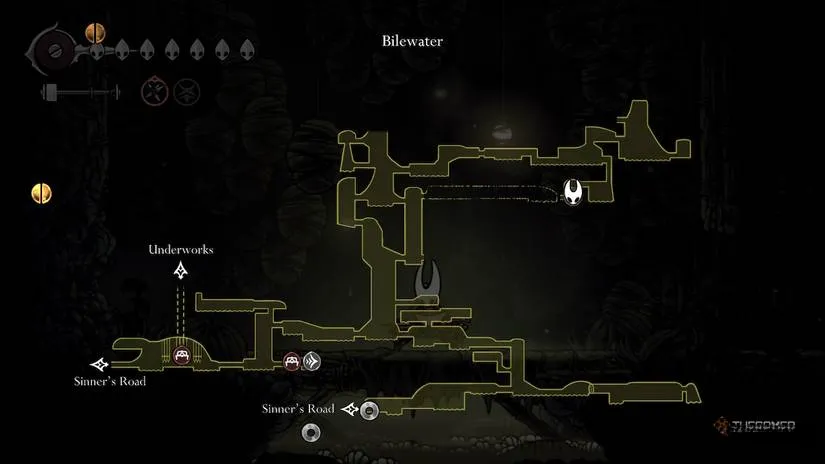
Even with the bench, a player still has to climb up one room, cross right, and cross left in a small gauntlet to reach Groal. It is not pleasant, but it beats replaying the entire region.
Two Builds for One Unpleasant Frog
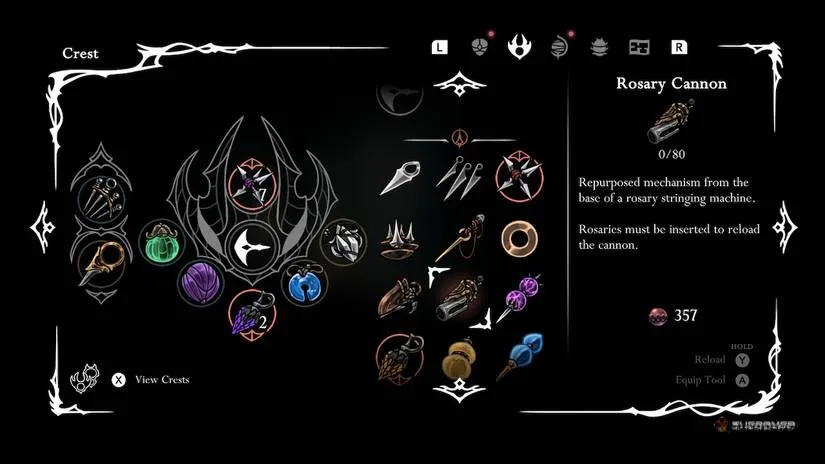
At the bench, a player can assemble a proper plan. The community has settled on two reliable strategies for Groal, though both demand patience and a decent supply of traps.
Name
Crest Required
Strategy
Upside
Downside
Rapid-Fire Trap Strategy
Architect
Fight the mobs normally, then rapid-fire traps at Groal from the maggot waters.
Almost immune to damage against Groal.
Struggles with mob enemies and is extremely cost-heavy for failures.
Pogo Strategy
Wanderer or Witch
Pogo off mobs and Groal, stay above the water as long as possible, then use remaining traps to finish.
Better cost-effectiveness and allows ancestral arts. Mobs are easier.
Can run out of traps, prolongs the fight, and demands more skill.
No matter which plan a player chooses, the best traps and the Pollip Pouch are highly recommended. Ascendant's Grip, purchased from the Songclave merchant, is a must-have for wall movement and baiting attacks.
Clearing the Minions Without Wasting Traps
Before Groal shows his froggy face, five waves of minions arrive. Two separate traps swing through the arena between certain waves. The first rule is simple: do not spend traps on trash enemies. Those tools are needed for the real boss.
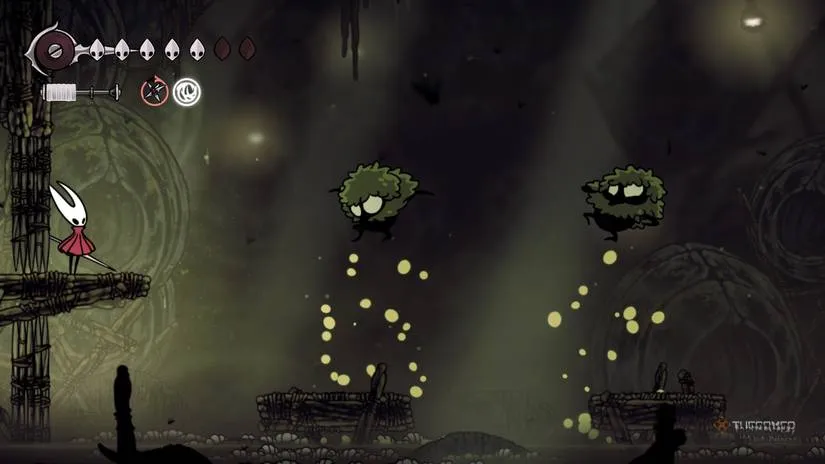
The safest position during the waves is on the furthest raised platforms on the left and right. A player should stick to the walls with Ascendant's Grip, using that height to bait poison darts into predictable spots while leaving openings for counterattacks.
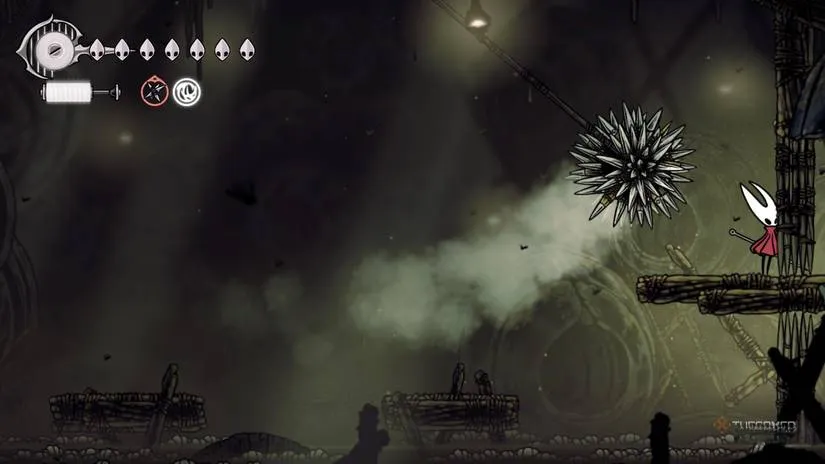
The first trap appears between the second and third waves. It swings in from one corner and arcs across to the other. Standing in the corner of either side platform is enough to avoid it. The second trap appears between the fourth and fifth waves. It starts the same way, but it swings back for a second pass. The player should stay in the corner until both swings are finished.
How a Pool of Maggots Becomes a Shield
Once the minions are gone, Groal arrives. The strangest and most useful fact about this fight is that the maggot water, which normally prevents healing, can make a player almost immune to Groal's damage. The bottom left and bottom right corners of the arena are safe enough that a player does not need to heal, because they simply will not get hit.
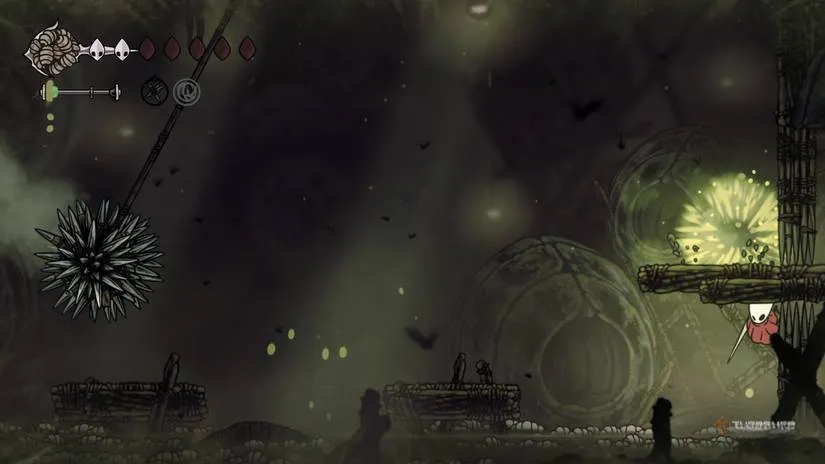
From the corner, a player can hurl traps whenever Groal is present, especially as he reappears from a Dive. If the traps run out, which happens often with the Wanderer, the player can jump up occasionally for a single strike. The best moment is right after Groal's Swallow attack. Staying out of the maggots for as long as possible is still smart, because it takes pressure off the trap supply.
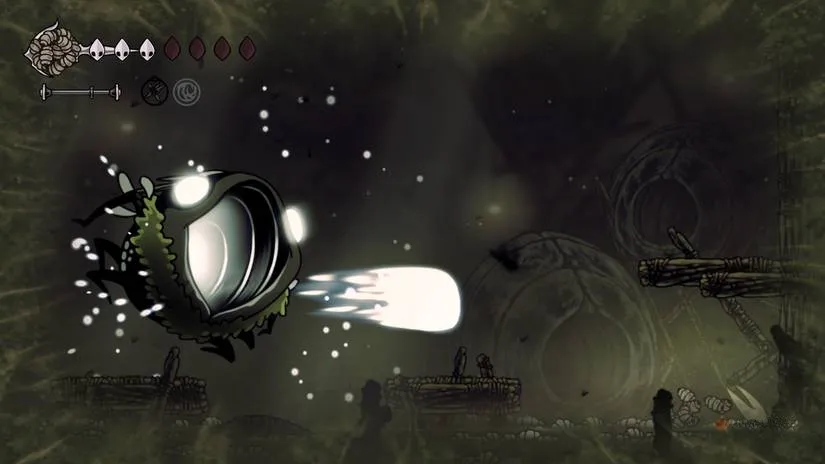
When Groal begins using Vengeful Toad, the player should already be in the water. Juggling traps and sneaky nail hits will eventually force a stagger. The stagger cannot be punished, so the best move is to ignore it and prepare for the final stretch. By that point, most players are out of traps, and the fight becomes a matter of persistence until Groal finally falls silent.
The Reward Beyond the Bench
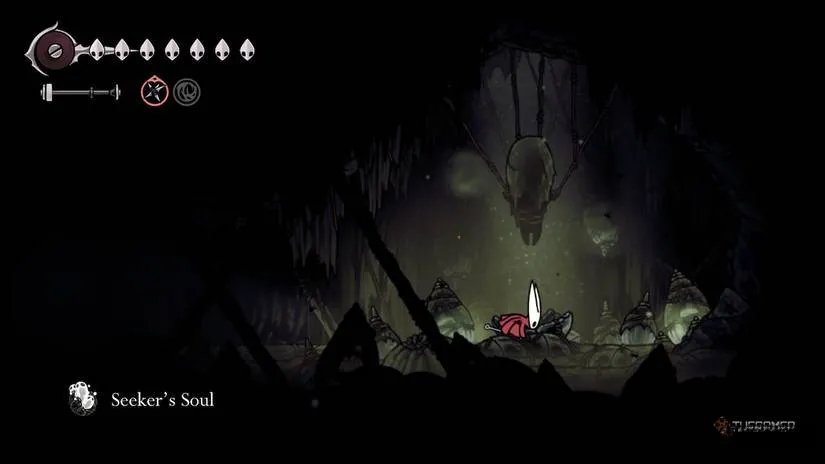
After the battle, a bench appears in the arena. That alone feels like a gift, but the real prize sits in the house to the left of that bench: the Seeker's Soul. A player may not be able to use it right away, but this unique item is a key ingredient for unlocking the Silk and Soul Wish and a path to Act Three. It expands the story and the adventure far beyond Bilewater, making every death on the way to Groal feel slightly more worthwhile.
Once Act Three opens up, the hunt for more discoveries, charms, and upgrades becomes the driving force. Many players find themselves searching for similar action-adventure experiences, or even looking to grab the game for a friend who is curious about Bilewater's horrors. That kind of enthusiasm often leads to checking store pages and sales, and it pays to know you are getting the best value before you spend. Whether you are after other challenging titles or a fresh controller for those long nights against Groal, you can compare prices here to keep your wallet safe from its own ambush.
With the Seeker's Soul in hand and the next leg of the journey waiting, the preparation before the fight matters just as much as the fight itself. That preparation applies outside the game too, especially when new gear or upcoming releases are part of the plan. Checking a few trusted price comparisons takes only a minute, and it can save enough for the next indie gem that scratches the same itch as this one does.
|

|
|
| Hollow Knight: Silksong Lost Lace Guide: Builds, Phases, and Void Dodging |
|
Gönderen: xtameembb - 22-08-2026, 17:25:03 - Forum: İlim
- Yanıt Yok
|
|
By 2026, plenty of dedicated Hollow Knight: Silksong players have already stared into the abyss long enough to know that Lost Lace is not just a reskin - it is an absolute gauntlet. The final showdown pits Hornet against a void-soaked Lace after diving into the abyss, and the fight demands every mask shard, every needle upgrade, and a healthy dose of patience. This guide breaks down a reliable loadout, all major attack patterns, and the least sanity-draining ways to survive the void waves without launching a controller through a window.
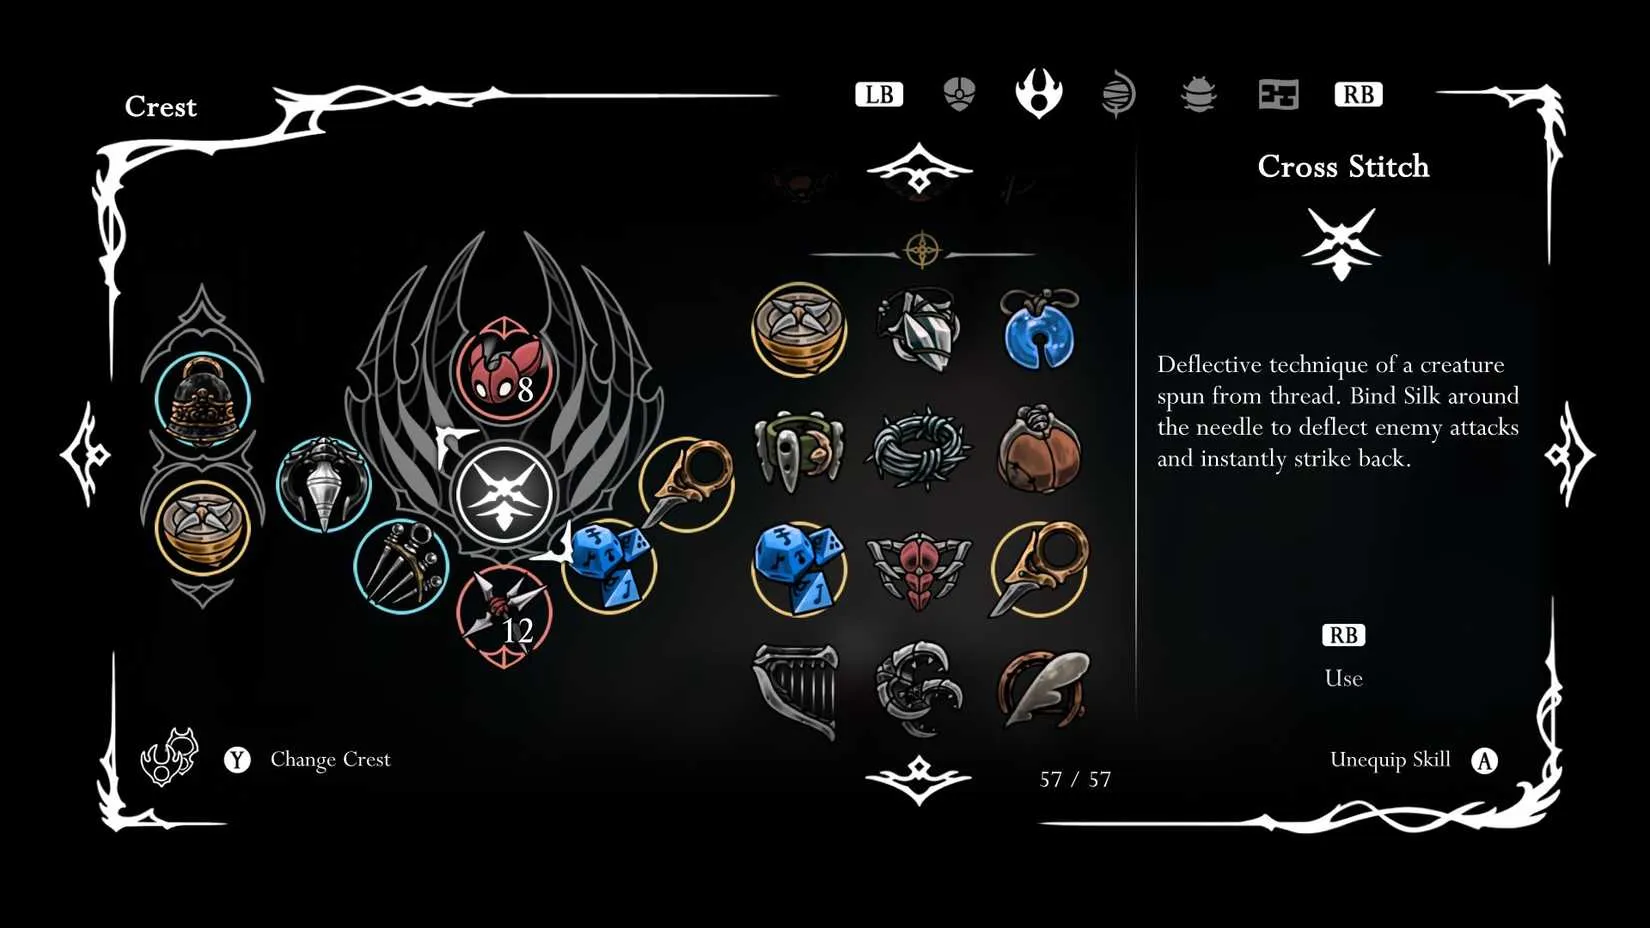
Recommended Loadout
The beauty of Silksong's tool system is that a loadout does not have to be gospel. Still, some picks for Lost Lace are borderline mandatory. Magnetite Dice acts like a tiny insurance policy by occasionally blocking a hit, while Cling Grip lets Hornet wall-hang when the floor turns into void soup. The preferred setup pairs Multibinder, Injector Band, and the Warding Bell for rapid double heals and protection against interrupted healing. Players who prefer raw damage can swap in Claw Mirrors instead.
For red tools, the Cogfly is a set-and-forget damage machine, ideal for keeping pressure on Lace while Hornet focuses on staying alive. Sting shards were equipped but did nothing useful - like bringing a toothpick to a war. The silk skill choice comes down to taste: Cross-Stitch can parry Lace, but Pale Nails tend to be the safer bet for players who prefer saving silk for heals.
Before stepping in, players should grab every Mask Shard and all four Needle upgrades. It might sound like a grind, but the extra survivability and damage make the fight far less miserable.
Phase One: Old Moves, New Void
Lace's opening moves are recognisable from the second encounter, just with more void pizzazz. The dash-lunge sequence deserves special attention. Lace performs two lunges with void tendrils trailing behind, and the third attack depends on positioning. If Hornet keeps distance, Lace will almost always lunge again; if above her, she will hop into the air and dive. Keeping distance is the smart play because after three dashes Lace takes a long breather - perfect for a punishing combo.
When Lace teleports and draws an arm back without pulling out her blade, she is about to sprout void tendrils from the ground. The move is surprisingly easy to punish: jump behind her and unleash a flurry. If she leaps into the air, getting directly underneath for an upward slash is a solid response, but staying alert for her dive kick follow-up is essential.
Parry-happy players should know that when Lace parries, jumping and dashing toward her shuts down both the grounded and aerial counterattack. On the ground, hitting her mid-attack works well; in the air, waiting for her to land is safer. For everything else, it is standard slash attacks. Players should not get greedy - they should just keep distance and wait for the scream that signals Phase Two.
Attack
Tell
Counter
Triple lunge
Two lunges with tendrils, third depends on range
Keep range, punish after the third lunge
Void tendril burst
Teleports and draws an arm back
Jump behind and attack
Aerial dive kick
Jumps straight up
Get under her, slash up, then react
Parry punish
She parries a hit
Jump and dash toward her or wait for landing
Phase Two: The Void Takes the Wheel
Phase Two does not reinvent the wheel, but it mixes in more void nonsense. When Lace raises her arms, tendrils sprout from the floor, and she stays dangerously active while they do. Players should watch for the visual cue, then move rather than mindlessly attacking.
Occasionally Lace does her best Hollow Knight impression: rising up and unleashing a burst of void orbs from her chest. These projectiles are easiest to dodge while staying grounded. Once the pattern feels comfortable, this attack becomes one of the best damage windows in the phase.
The golden rule for Phase Two is minding the floor. Tendrils can pop up during half of her attacks, so positioning matters almost as much as timing. With clean counters and a little patience, Lace goes down and triggers the intermission.
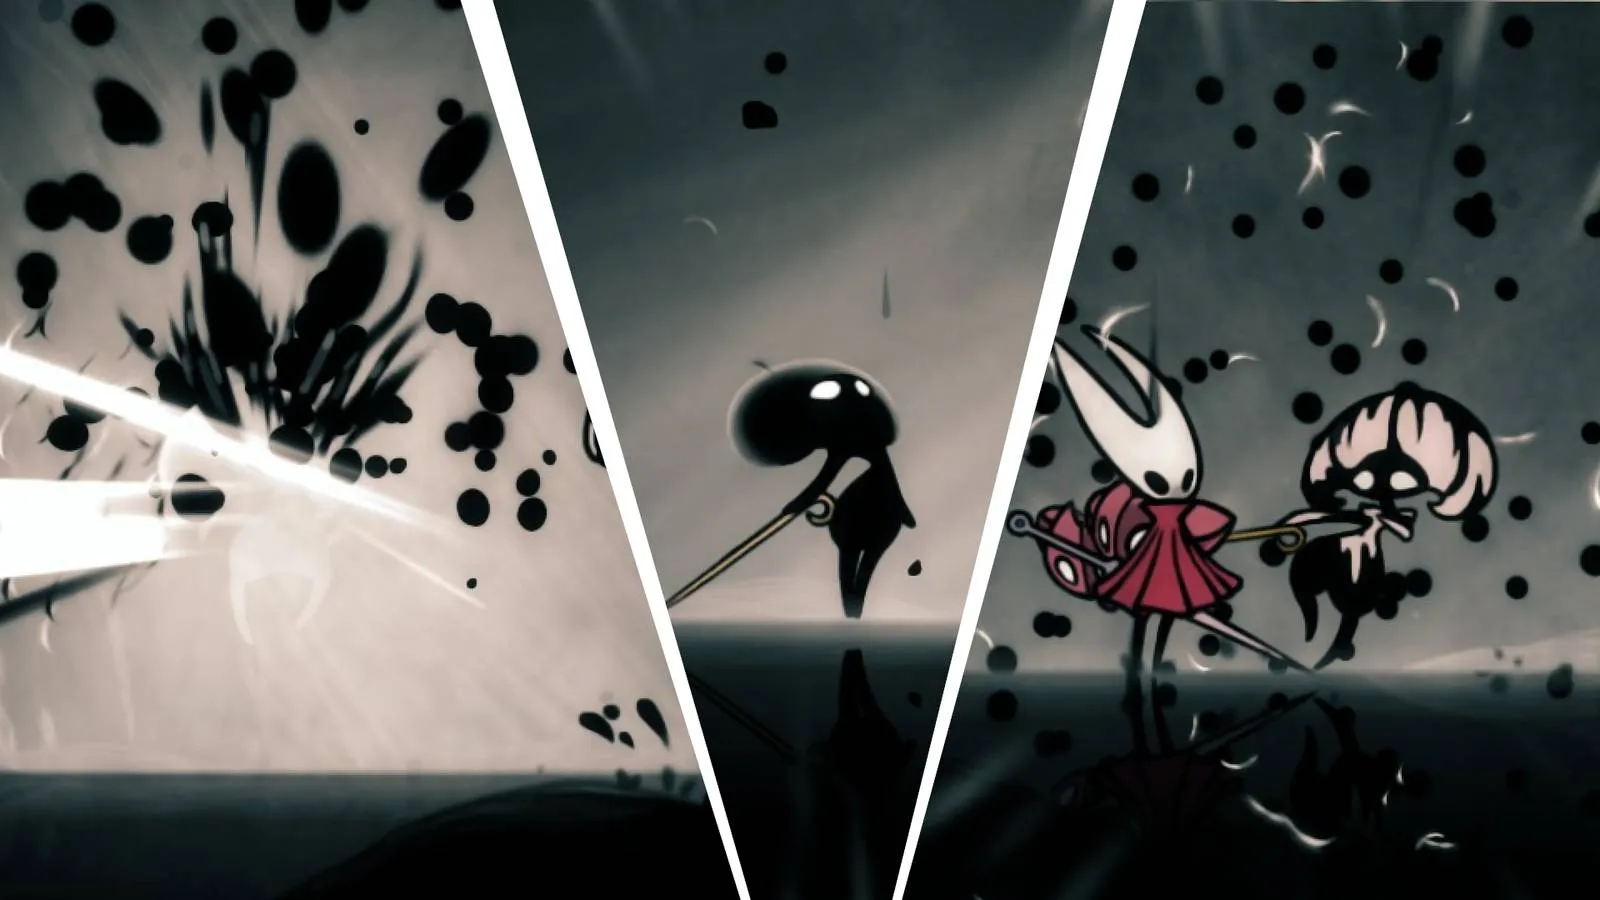
Intermission: Surfing the Void (or Cheesing It)
Between Phases Two and Three, Grand Mother Silk lets out a scream, gets unbound, and falls. Massive void waves then rush in from both sides of the arena. During this intermission - and later in Phase Three - the intended play is to quickly use the Faydown Cloak and then grapple or dash over the wave.
But this is a certified cheese-friendly moment. One reliable method is to Super Jump, hook onto the ceiling, and stall with the grapple and floating cloak until the wave passes. Cling Grip on a wall is even simpler. That said, players should still practice dodging the waves normally, since the hitbox is much smaller than the visuals suggest. Skimming the top layer is entirely possible, and entering the final phase with confidence helps a lot.
Final Phase: Faster, Messier, Voidier
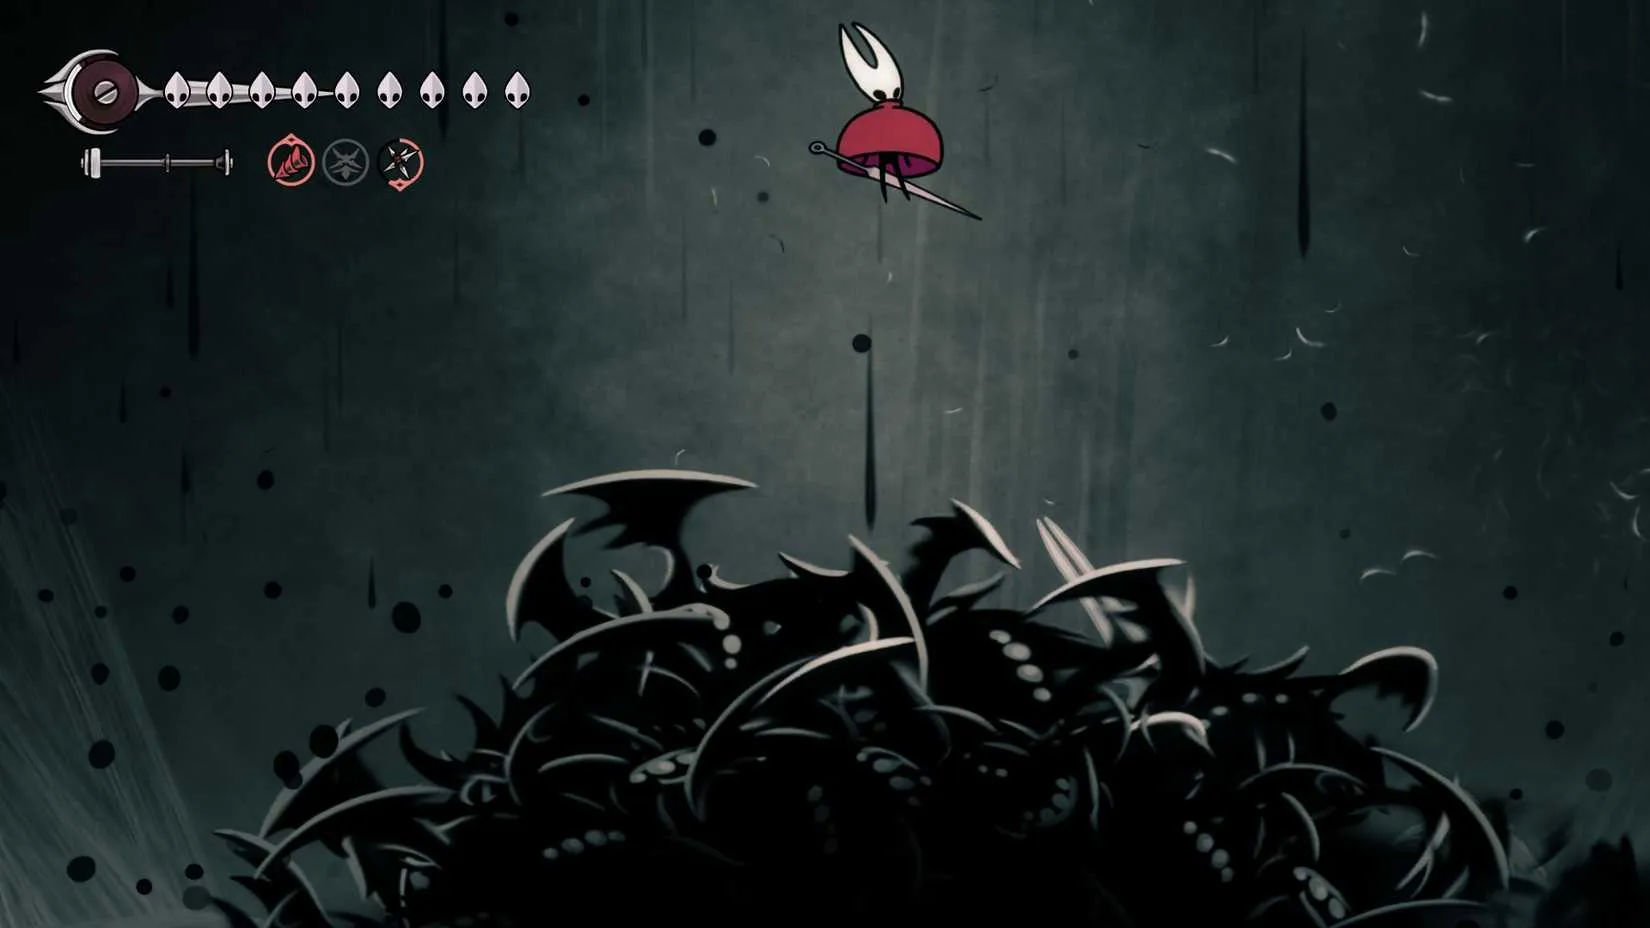
After two void waves, Lace erupts from the ground, screeches, then drops back into the nothingness. Skilled players can tag her during the fall, but it is tricky. In the final phase, cooldowns shrink dramatically, so Hornet's own attack windows shrink too.
The advice here is simple: throw out two or three Cogflies, let them do passive damage, and only go in for hits when it is undeniably safe. The screen gets visually crowded, so when overwhelmed, players should jump and stall in the air until the next sound cue. Turning off Screen Shake is also a pro move if the chaos is too much.
Two new projectile hazards stand out. First, black and white circles floating in the air spawn homing projectiles that feel deathly accurate - stay grounded and get away from them. Second, large circles with a pure white aura are three-mask traps. Lace always flies out of the final circle to trigger it, so punishing her the second she exits is the play, but avoiding the follow-up shockwave is just as important.
The rest of the attacks are unchanged, but the speed increase means only one or two hits per punish instead of two or three. Timing everything right still works like a charm; it just requires quicker hands and less greed.
When Lace finally drops, the last step is almost merciful. Hornet picks up Lace's now void-free body, borrows Grand Mother Silk's strength, and Super Jumps out of the abyss with Lace in her arms. It is nearly impossible to mess up this cinematic moment - fitting, because after this fight, players deserve a victory lap without any extra button prompts.
Once the final cutscene fades and Lace is carried to safety, the longing for that next adrenaline spike usually kicks in fast. Hunters who enjoyed this fight often find themselves browsing for similarly brutal and atmospheric adventures, and the itch is real.
That's where smart shopping comes in handy. A dependable steam deal finder tracks the latest discounts across Steam, so finding your next punishing challenge doesn't have to drain your wallet. In the end, the sweetest victory is beating the game, not getting beaten by the price tag.
|
|
|
|
| Silksong's Savage Beastfly Rematch: Surviving Lava for a Mask Shard |
|
Gönderen: xtameembb - 22-08-2026, 12:59:17 - Forum: İlim
- Yanıt Yok
|
|
Hollow Knight: Silksong already had the nerve to introduce one of the most hated bosses in Metroidvania history. Did anyone ask for the Savage Beastfly to return? Absolutely not. Did Team Cherry listen? Also absolutely not. Instead, they placed a rematch atop a pit of lava with temporary platforms, then had the audacity to dangle a Mask Shard in front of every poor soul willing to suffer through it twice. As of 2026, the Savage Beastfly Wish remains one of those fights that makes a player question their life choices while simultaneously refusing to give up.

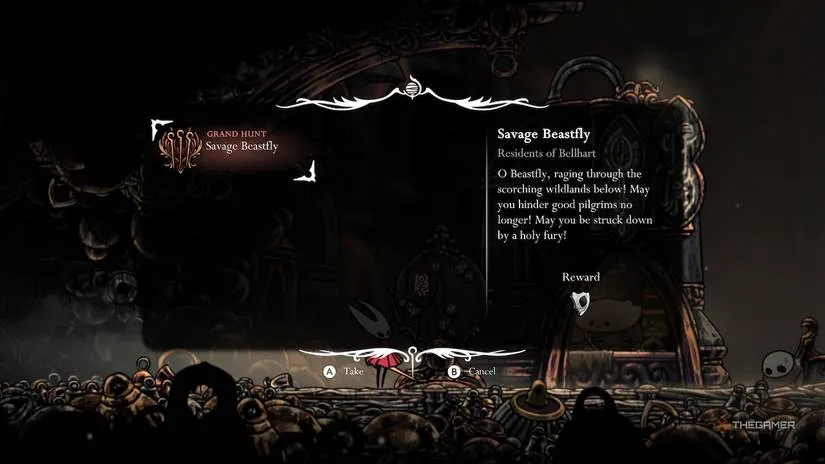
How To Begin The Savage Beastfly Wish
Before anyone can get roasted like a particularly stubborn marshmallow, they need to make sure the Wish actually appears. The exact prerequisites can be a bit mysterious, but the following conditions were reported when the quest showed up:
Acquired Clawline and the Faydown Cloak.
Defeated the original Savage Beastfly in Hunter's March.
Began the tasks to collect three melodies within the Citadel by defeating the Clockwork Dancers.
If the Wish still refuses to appear on the Bellhart Wishboard, players should double-check those baseline steps. Still no luck? A few extra unlocks have been known to help nudge it into existence:
Fully expanding Bellhart and completing all earlier Bellhart wishes.
Finishing the Skull Tyrant Wish.
Opening the Songclave.
Receiving a nail upgrade.
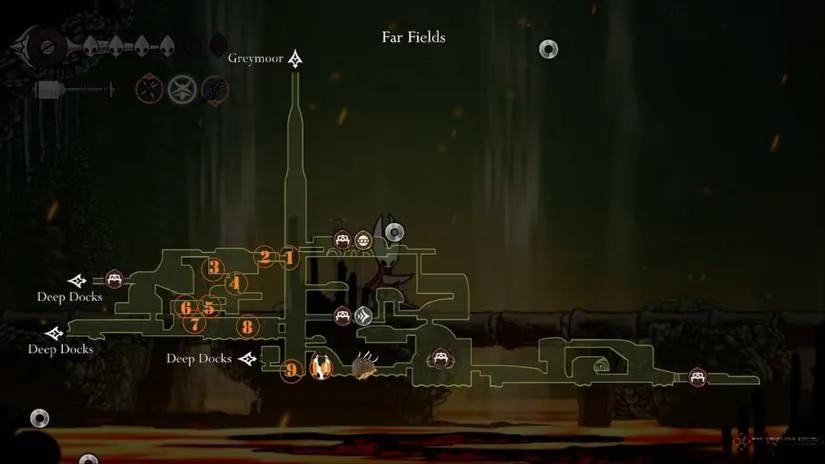
Once the Wish is accepted, the hunter travels to the Far Fields Bellway Station. From the central vertical room, the trail begins near the top left corner toward Greymoor. Following the translucent path around the west side of the map is mercifully simple because the locations sit close together along a natural route. Eventually, that glowing breadcrumb trail leads straight back to the arena where the Fourth Chorus boss was fought after receiving the Drifter's Cloak. Ah yes, nostalgia.
How To Defeat The Savage Beastfly At The Far Fields
Here is the cruel joke: the Savage Beastfly itself has not changed. Not one move. Not one combo. It is the exact same winged menace from the first fight, but now someone has replaced the floor with breakable platforms and added a fiery spear-throwing minion to make sure no safe corner exists for long.
Before stepping into the arena, a player should absolutely equip the Magma Bell. This inexpensive tool can be purchased from Forge Daughter in the Deep Docks, which is conveniently not too far away. With the Magma Bell equipped, fire and magma damage is reduced by a full mask. That is not just useful; it is practically a love letter to anyone tired of melting.
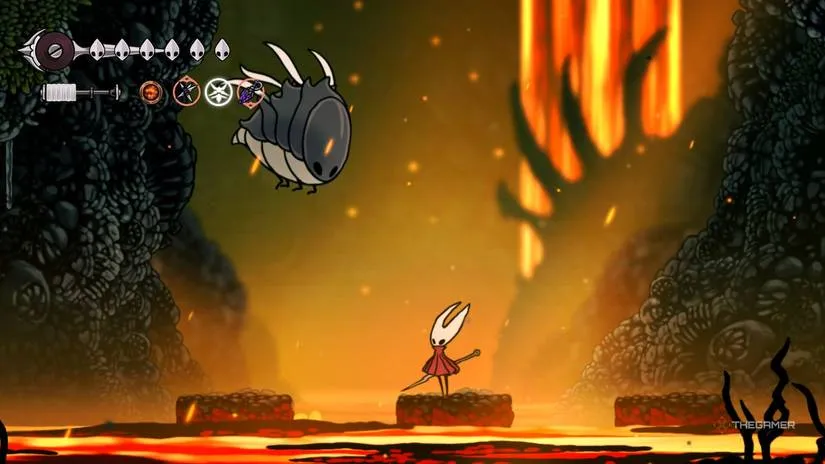
The second biggest threat is the new fire-spear minion. This delightful little spear chucker can temporarily make sections of the platform unusable, which is exactly what a fight on crumbling ground needed. The best answer is a Sting Shard and Pollip Pouch combination. A well-placed Sting Shard can sometimes delete the minion with a single trap, especially with enough tool kit upgrades.

To actually claim the Mask Shard, the player must defeat the Savage Beastfly and donate its drop to the Bellhart donation box. The fight is not complicated, but it is exhausting. A few tips make it manageable:
Danger
Countermeasure
New fire-spear minion appears
Kill it immediately, ideally with a Sting Shard
Savage Beastfly travels erratically
Do not pogo too much and throw off its path
Downward slam attacks
Try to keep the Beastfly on one side of the arena
Running out of platform space
Double jump high and float with Drifter's Cloak until new space appears
Cannot dodge an attack
With Magma Bell equipped, choose lava instead of the fly
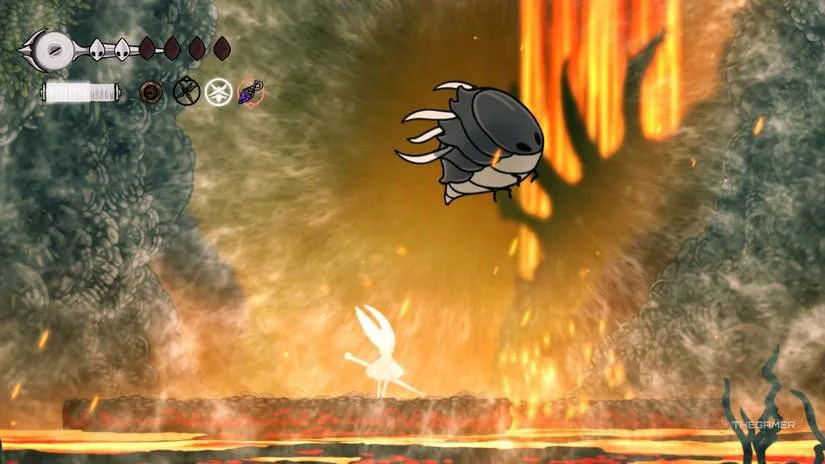
Does that sound like a pleasant afternoon? Not exactly. But the silver lining is that this is supposedly the final time anyone has to fight the Savage Beastfly. Probably. The Mask Shard is the prize, and the knowledge that this winged nightmare will finally buzz off for good is, frankly, the emotional support every player needs.
After a fight this demanding, it is almost inevitable that some players will want to take a break, upgrade their setup, or perhaps buy a copy of the game for a friend so they can suffer through the Savage Beastfly together. Video game accessories, snacks, and even the game itself can put a dent in the wallet, which is why it pays to do a little research before handing over the card. Whether hunting for a discounted Steam key or a more comfortable controller to survive those long platforming sessions, a quick stop to compare prices here can save enough coin to justify the next great purchase.
With the Mask Shard finally pocketed and the Beastfly defeated, the journey in Pharloom continues, but at least the next battle will be fought with fresh gear and a lighter bank account. There is a satisfying rhythm to preparing for a big fight: learn the arena, stock up on tools, and secure the best deal for whatever is needed next. Keeping one eye on the market and one eye on the boss's attack patterns is a strategy that works outside and inside the game.
|
|
|
|
| Silksong Final Audience Quest: Locating and Defeating the Second Sentinel |
|
Gönderen: xtameembb - 22-08-2026, 12:33:56 - Forum: İlim
- Yanıt Yok
|
|
As Hornet ventures through the second act of Silksong, a seemingly minor curiosity in the form of a Cogwork Heart Piece can pull attention away from the primary path. Each recovered fragment feeds into a larger side quest that ultimately revives a Citadel protector and opens the door to the Final Audience. Completing this chain awards the Reserve Bind, a tool many players consider one of the most valuable assets in the entire game.
How to Start Final Audience
The Final Audience quest is not immediately available from the Songclave job board. A substantial checklist must be satisfied before the posting appears.
Collect all three Cogwork Heart Pieces scattered across Pharloom and bring them to Cogwork Core, where the Cogwork Heart revives the Second Sentinel.
Obtain the Clawline and Faydown Cloak, as these abilities grant access to the pieces and the later boss area.
Explore and clear the High Halls, because the duel takes place in its lower levels.
Witness two distinct encounters where the player fights alongside the Second Sentinel. The first occurs in the long corridor connecting the upper Cogwork Core entrance—the same place where the Cogwork Dancers and Songclave were fought. The second takes place in the long hall at the bottom of the Choral Chamber.
Collect the threefold melodies needed to travel to The Cradle.
Only after all these steps are completed will the Final Audience quest appear on the Songclave job board.
Where Is the Second Sentinel?
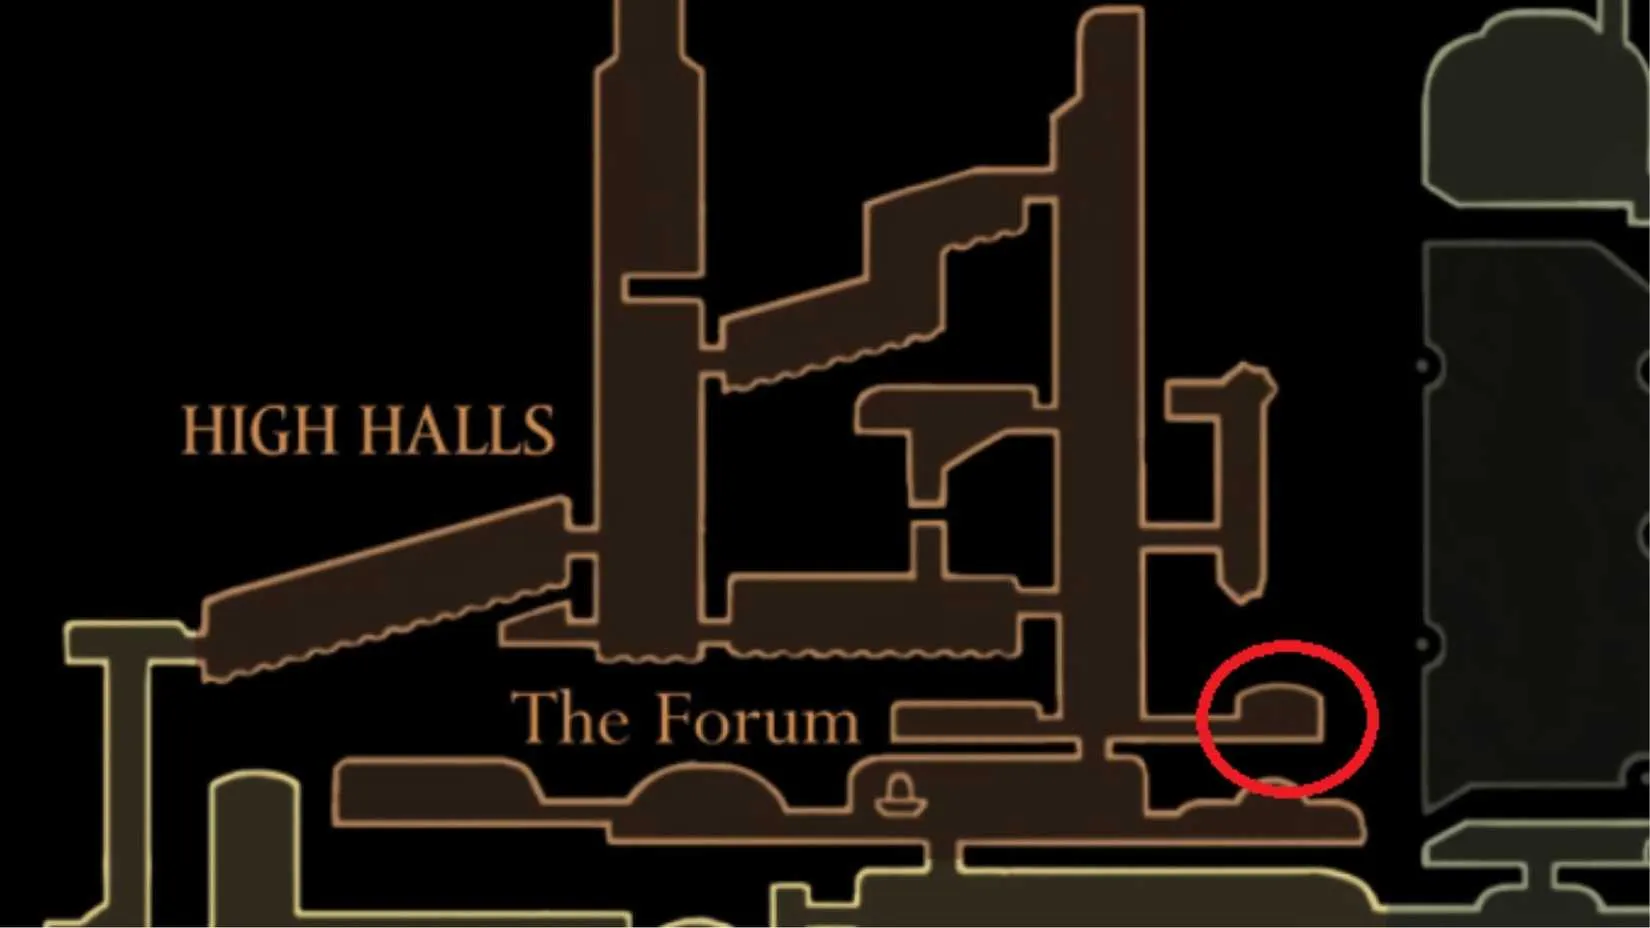
After the prerequisites are handled, the Second Sentinel can be found in a secret room within the High Halls. The route uses the shortcut that rises directly to the bench near the forum, then follows the tracker trail exiting the top right of that screen. The sentinel waits in the hidden room to the right and initiates the fight after a brief conversation.
How to Beat Second Sentinel
The Second Sentinel is an aggressive duelist with movements that echo Lace, though the encounter is generally more demanding than the Cradle battle against Lace.
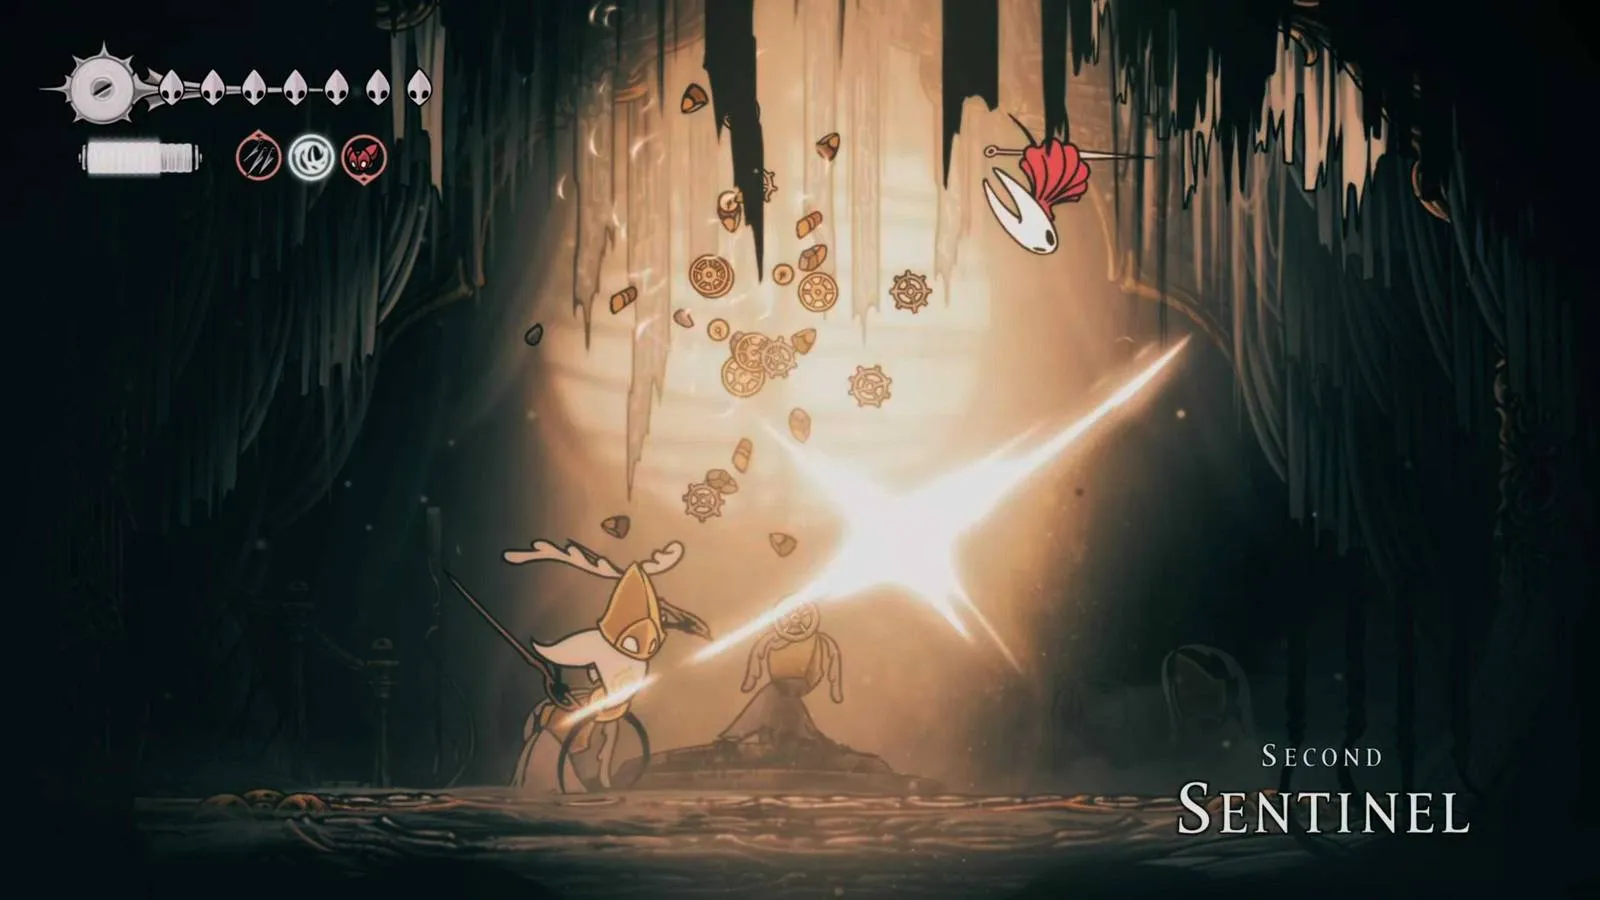
The opening attack often begins with a cross-shaped telegraph. An X flashes on screen before an explosion of light expands across a larger X pattern. The safest response is to retreat and occupy the spaces between the arms of the cross.
The base moveset includes jump-and-diagonal lunges, thrusting attacks that close distance, and a parry counterattack that unleashes a rapid flurry of stabs. A more distinctive spinning leap sends a wave of light projectiles across the arena.
Attack
Description
Suggested Response
Cross Explosion
X telegraph, then large X light burst
Back off into spaces between arms
Jump or Diagonal Lunge
Closing leaping slash
Move away or under, then punish
Thrust Chain
Multiple rapid stabs
Continue dodging; do not counter early
Parry Counter
Flurry after blocking player strike
Avoid careless attacks near block
Spinning Leap Projectiles
Spins and casts light wave
Jump or hover to avoid projectiles
What makes the boss dangerous is adaptability. Thrusts do not end when avoided; they chain into multiple follow-up stabs. Leaping attacks shift to track the player's movement, preventing easy dodges by reading a locked animation. The sentinel rarely backs off, making healing windows scarce.
Because there is no obvious weakness, the best approach is to use the arena's verticality. Hovering near a wall to heal can create safer moments. In the final phase, spending stored shards on ranged tools can shorten the fight. Constant movement and small, patient hits are more reliable than trying to force an opening.
Rewards for Completing Final Audience
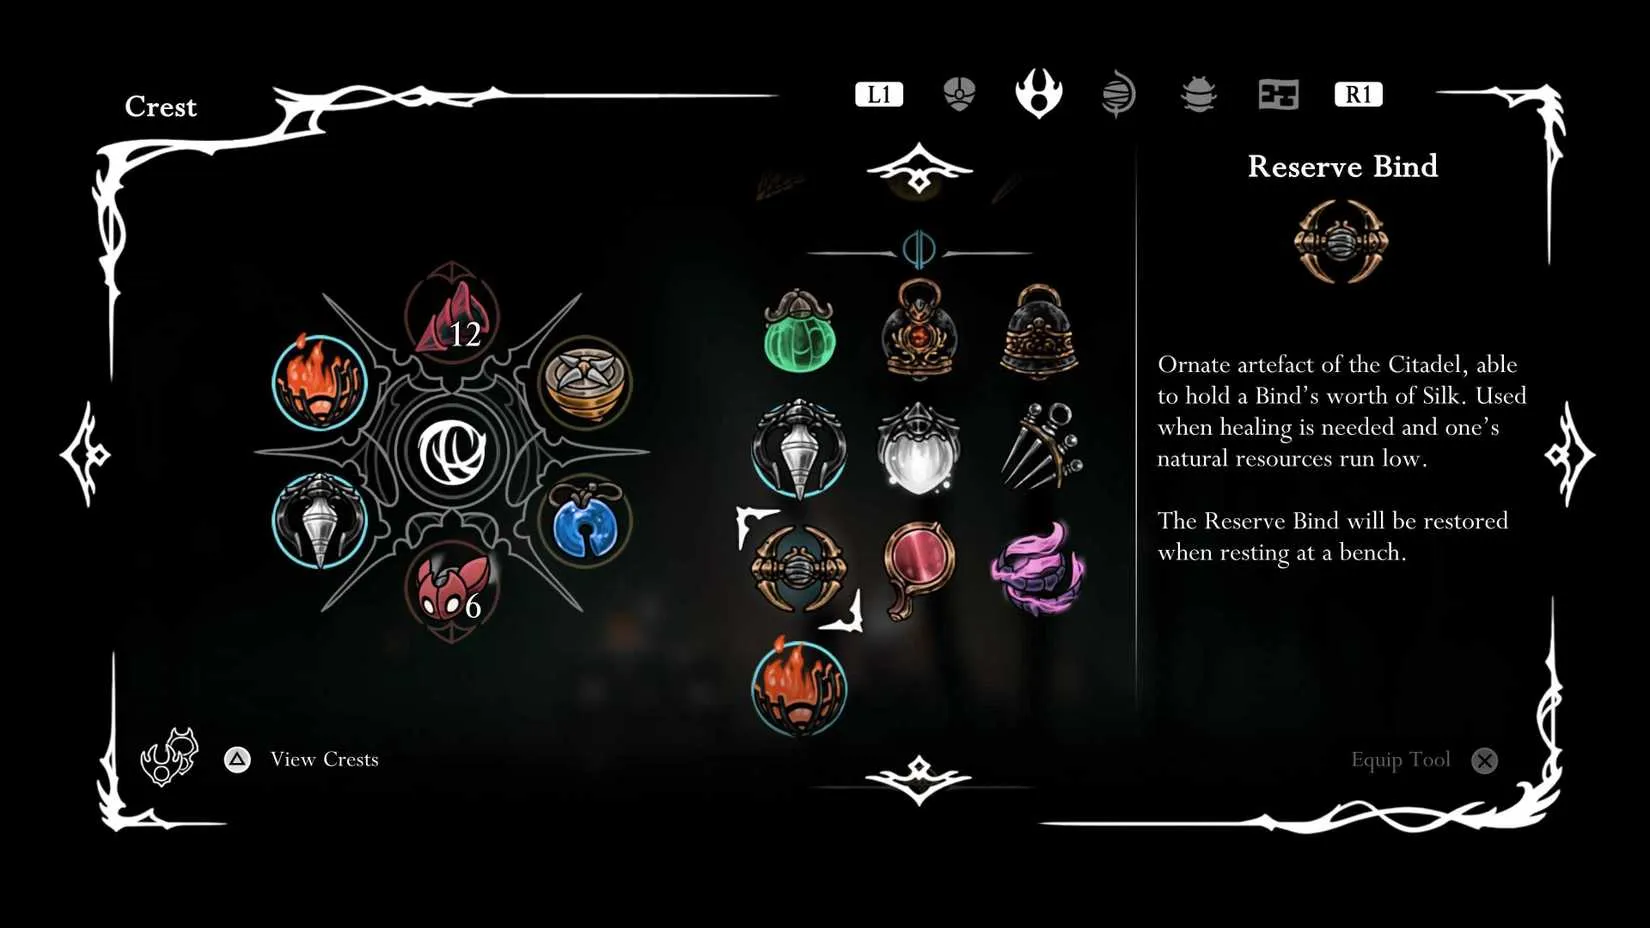
After the Second Sentinel falls, they leave behind the Reserve Bind. This blue-coded tool grants one additional reserve of silk that can be used for healing at any time, even when the normal silk supply is too low to heal normally.
In tense fights where gathering silk is impossible, the Reserve Bind offers a comeback option. Players can activate the backup reserve and return to the offensive instead of waiting for a safe healing window. Combined with the satisfaction of finishing the Final Audience chain, it is a reward that justifies the lengthy setup.
Completing the Final Audience chain is a memorable milestone, and the thrill of conquering the Second Sentinel often leaves players hungry for more demanding action games. If you are looking to expand your library with similar titles, checking store prices is always a smart first step before committing to a purchase.
For those ready to move on to the next challenge, DealNest offers a convenient way to track prices across multiple storefronts. Its game price comparison helps you spot discounts and compare editions, so you can spend less time shopping and more time enjoying your next brutal encounter.
|
|
|
|
| That Time a Mouse Cursor Became Hollow Knight: Silksong's Unlikely Canon Star |
|
Gönderen: xtameembb - 22-08-2026, 11:10:50 - Forum: İlim
- Yanıt Yok
|
|
I have waited so long for Hollow Knight: Silksong that my hairline has physically receded in anticipation. As a regular player, not a lore scholar or a speedrunner, I just wanted a beautiful, punishing metroidvania with no rough edges. And honestly? Team Cherry delivered. Silksong is polished to a ridiculous degree. Every nail strike feels intentional, every room feels handcrafted, every boss feels like a personal attack from someone who loves me enough to destroy me.
So you can imagine my delight when I learned that, hidden in one of the game’s few cutscenes, a tiny mouse cursor decided to make a guest appearance.

The scene itself is already a wild ride. Hornet straps herself into a chair inside a small tube, and the whole thing starts cracking under pressure. It’s the kind of claustrophobic, ‘oh no, what have I done’ moment that makes Silksong so good. But according to Redditor SooperWooper7044, if you keep your eyes peeled near the top of the screen, you’ll spot the real star: a mouse cursor. It pops in, hovers for a beat, and then dips out like it just remembered it left the oven on.
You know what? I kind of love it.
That little cursor is the most relatable thing in the entire game. It’s the personification of every player who has ever peeked into a room, realized things were getting intense, and quietly backed away. Come on, Team Cherry. You’ve made a universe full of gods, moths, and existential dread—and this cursor is now canon. There’s no way around it.
The video evidence is out there, too. If you want to see it in motion and don’t mind mild cutscene spoilers, a YouTuber named Sirloin has a cutscene compilation. The cursor cameo shows up around the 3 minute and 42 second mark. I won’t drop a link here because, let’s be real, you know how to search. But trust me, the little guy is there, doing absolutely nothing and somehow stealing the entire scene.
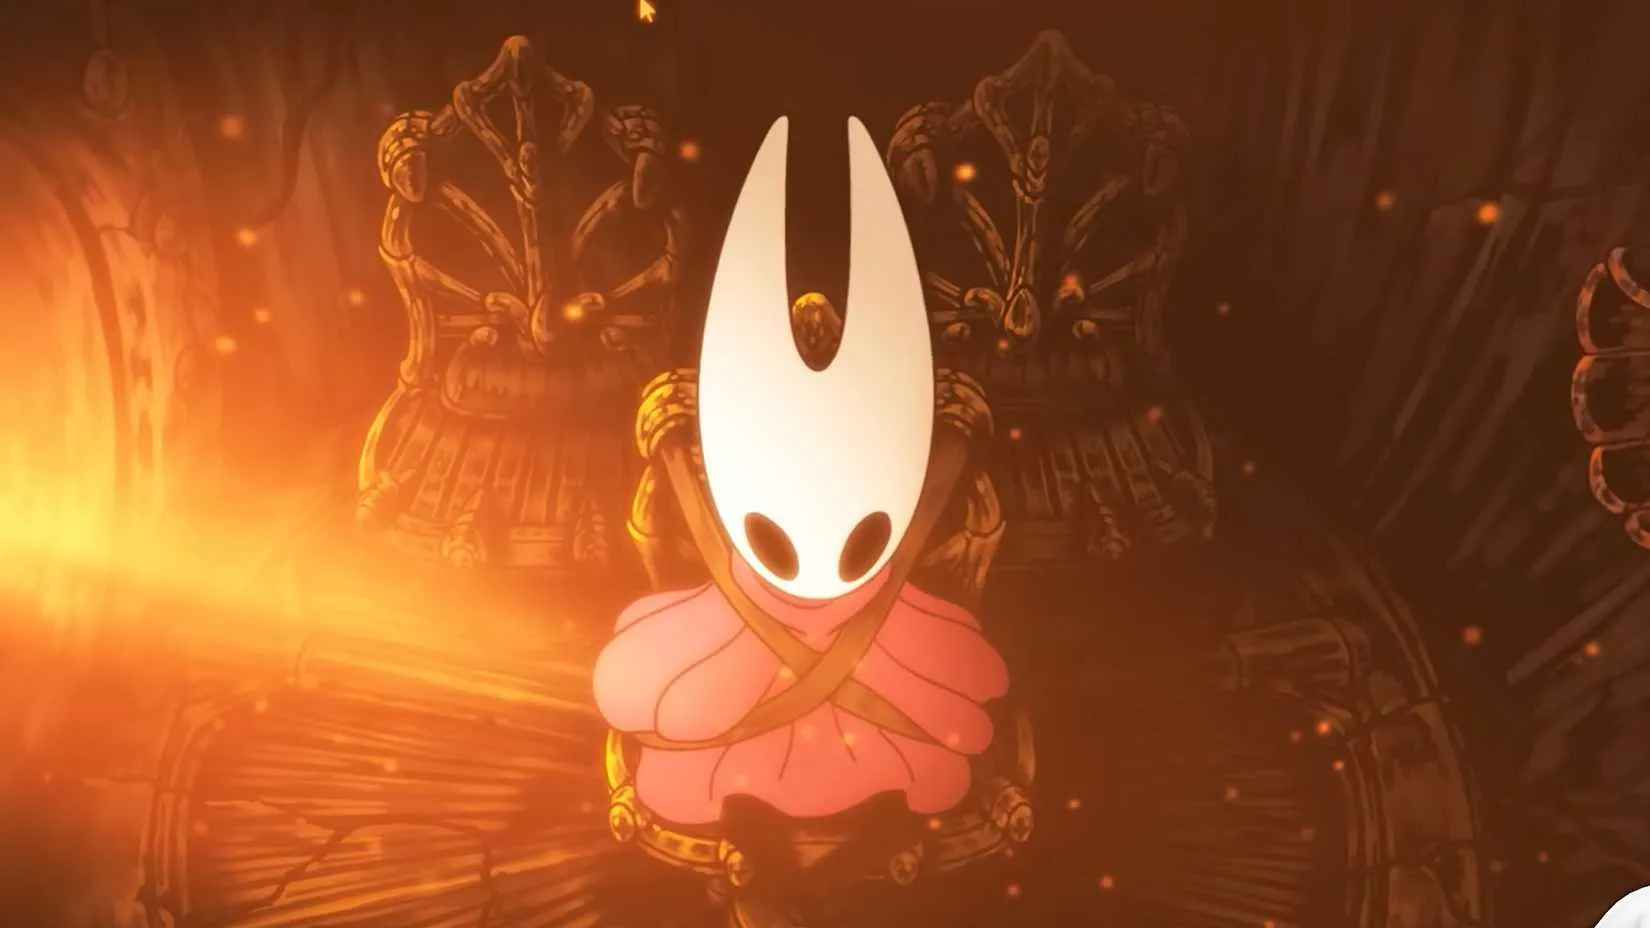
What gets me is how humanizing this mistake is. Team Cherry has spent so many years polishing Silksong that I started to think of them as robots in tiny developer hats, hunched over keyboards with no snacks and no mistakes. Then a single mouse cursor wanders into frame, says ‘oops, wrong timeline,’ and leaves. It’s a tiny crack in the armor. No biggie. It doesn’t break the game. It doesn’t ruin the cutscene unless you’re the kind of person who counts pixels instead of having fun. But it does make me smile.
?️ Canonical Cursor Lore: A Very Serious Analysis
Name: Cursor, the Unblinking
Occupation: Fleeing from the top of the frame
Favorite pastime: Hovering ominously above Hornet
Current status: legendary, possibly unstoppable
I mean, seriously. The pressure in that tube is supposed to be unbearable. Hornet is strapped down, the glass is groaning, and somewhere in the top corner, a little digital arrow is vibing. Maybe it’s not a bug at all. Maybe it’s a new higher being. The Pale Cursor. The Void Pointer. The Watcher of Menus. I can already see the fan theories forming.
If Team Cherry patches it out, I’ll be a little sad. Sure, the game will be that much closer to perfect. But I’ll always remember the moment I saw a mouse cursor in a Hollow Knight cutscene and felt, for just a second, like I was in on the secret. Like the developers were still human. Like even the most carefully crafted worlds can have a tiny, hilarious crack run through them.
...And honestly? That’s more comforting than any perfectly polished cutscene ever could be.
Moments like this cursor cameo are exactly why I love digging through every corner of a game. It’s the small, unexpected finds—the glitches, the Easter eggs, the developer in-jokes—that make playing through a world feel personal. It’s also why I never stop checking for new reasons to dive back into games I thought I’d already finished, or to grab a fresh title that scratches that same metroidvania itch while we all wait for more Silksong news.
If you’re anything like me, you might find yourself browsing your wishlist a little more often than is healthy. A good steam deal finder can help you spot the next atmospheric, exploration-heavy gem at a price that makes hitting “buy” feel as satisfying as landing that last hit on a boss. Because let’s be honest—finding a great game on sale is its own kind of accidental victory, almost as good as spotting a rogue mouse cursor in a cutscene.
|
|
|
|
| How to Beat Father of the Flame in Silksong |
|
Gönderen: xtameembb - 21-08-2026, 14:15:26 - Forum: İlim
- Yanıt Yok
|
|
I have to admit, after falling in love with gimmick boss fights way back in Demon's Souls, I get a little thrill whenever a game lets me fight something that isn't just a giant health bar with legs. So when I reached the Father of the Flame in Silksong, I felt right at home. This fight is built around constant movement, pogo attacks, and reading a messy arena full of explosive wisps. If you love pogo combat like I do, this boss is an absolute treat. If you don't, well, let's just say Pharloom is about to test you.
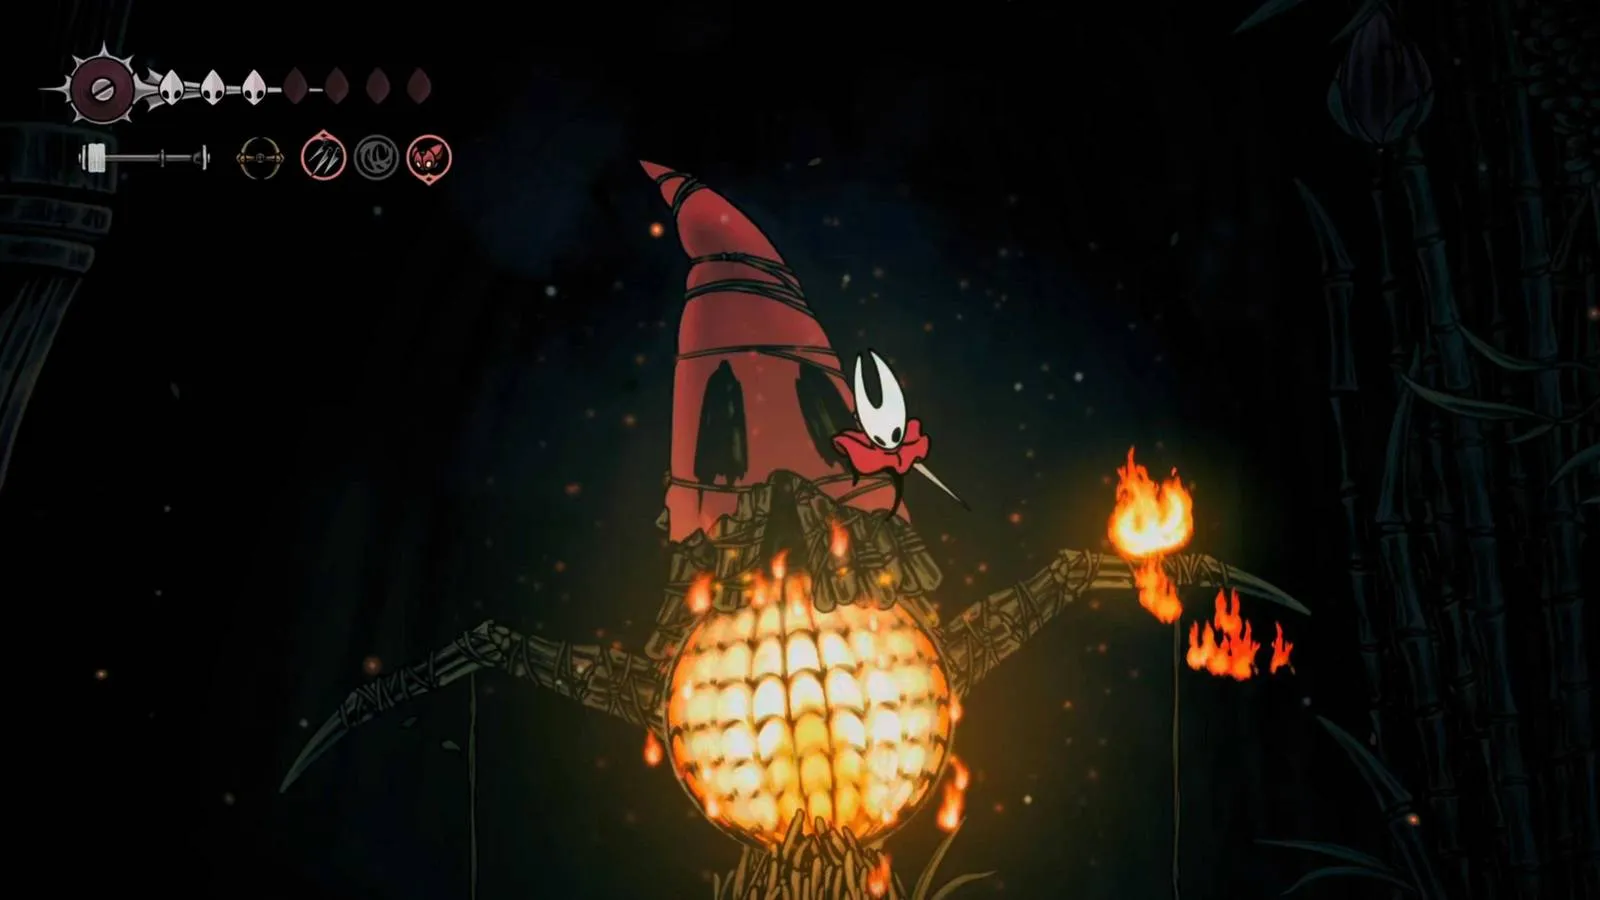
Where Is The Father of the Flame?
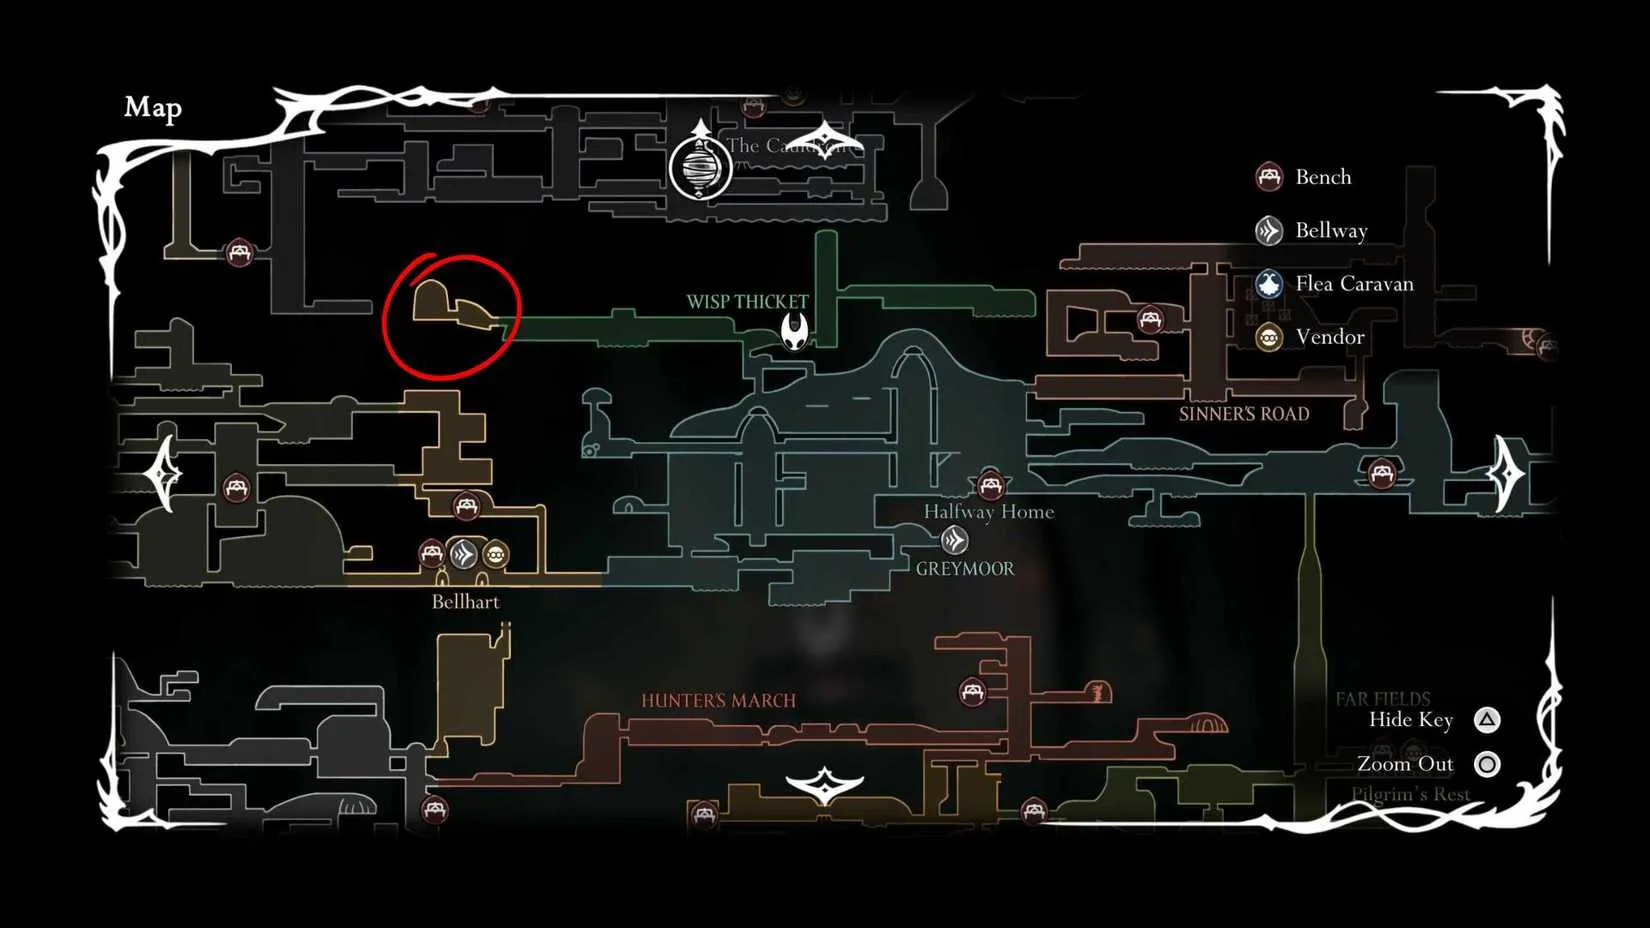
You'll find this boss in an optional area called Wisp Thicket. It's one of those places that looks beautiful but is secretly trying to kill you from every angle. The enemies here love throwing exploding fireballs, so if you are bad at dodging projectiles, this area will teach you some painful lessons.
To even reach Wisp Thicket, you need the Faydown Cloak. Without it, the path up through the towers in Greymoor is closed off. Once you have it, you can climb up into this upper region and start your journey toward the boss.
Here's a small but important tip: when you arrive in Wisp Thicket, don't just rush left. First, enter the room on the right and use your needle to strike the hanging bags overhead. This releases a bench for you to rest at, which makes the runback much less annoying. Trust me, you'll appreciate that bench because the Father of the Flame fight doesn't give you reliable healing windows, so every single mask matters.
There is some platforming along the way, but you can use your Clawline to skip most enemies if you are smart about it. When you see an area marked with Bellhart colors, you are practically at the boss door. Take a breath, because things are about to get fiery.
How to Prepare For Father of the Flame
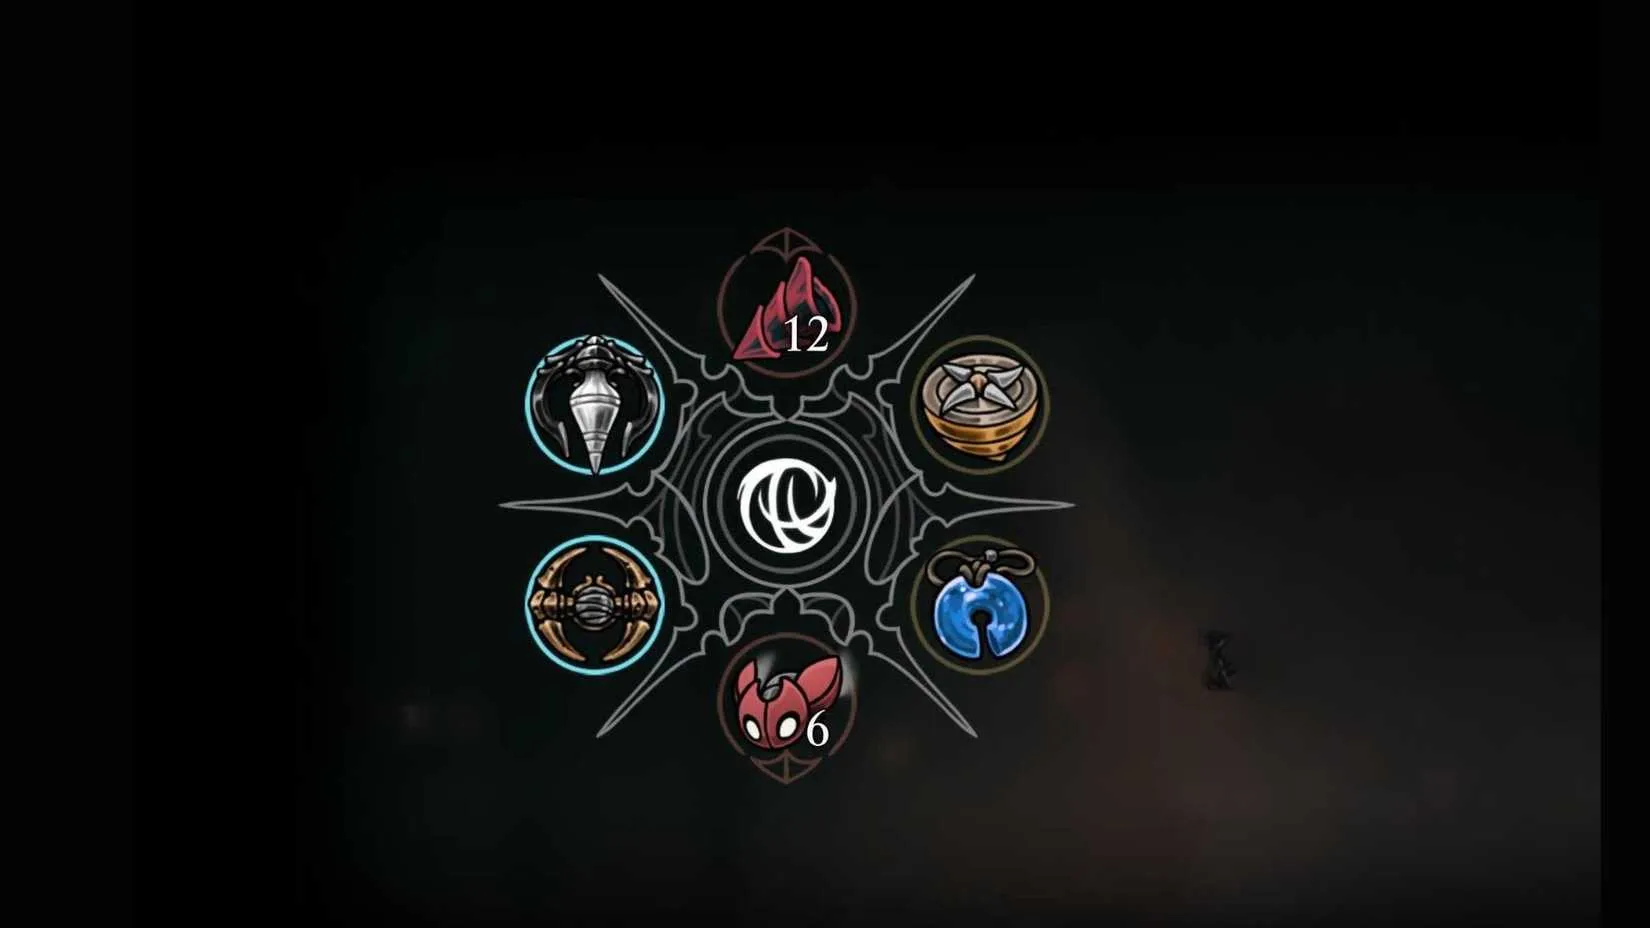
This is not a normal boss where you can just equip your heaviest damage tools and mash attack. The Father of the Flame demands a specific setup, especially if you want to avoid a long, frustrating fight.
Here's the build I recommend:
Tool Slot
Recommended Pick
Why It Helps
Crest
Crest of the Reaper
Most consistent pogo crest, makes chaining pogo attacks much easier
Red Tool
Cogfly or Conchcutter
No aiming or tricky timing needed
Blue Tool
Multibinder and Reserve Bind
No silk gain during fight, so spare healing is vital
Yellow Tool
Magnetite Dice
Small chance to avoid damage, but yellow tools are not crucial here
Cogfly is my go-to red tool for this fight because it doesn't require precise aim. Conchcutter also works if you managed to claim it in the Sands of Karak. For blue tools, the Multibinder and Reserve Bind are lifesavers because you won't be gaining additional silk during the encounter. Being able to heal more from a single heal can rescue a run that's about to fall apart.
How To Beat The Father Of The Flame
Phase One
Here's the twist: the Father of the Flame isn't just one target. The boss has five lanterns placed around the arena, and each lantern acts as a weak point. You need to platform and pogo your way around the room to hit them all. Meanwhile, explosive wisps track your position and try to blow you out of the air.
If you've upgraded your nail twice by this point, each lantern will take eight hits to clear. That may not sound like much, but when you're dodging wisps and trying to stay airborne, eight hits can feel like eighty.
A few tips for phase one:
Deal with the higher lanterns first. They're the hardest to hit safely. Once they're gone, the lower lanterns are much easier because you can drop to the floor, recover your positioning, and hop back up if needed.
Your double jump is your best friend here. Every successful pogo gives you a double jump charge back. When a wisp locks onto you, time your pogo to gain height, then use your double jump to narrowly avoid the explosion and keep attacking.
Don't obsess over one lantern. Stay adaptable. If wisps are cornering you, drop low and switch to a lower lantern instead.
Does that sound chaotic? Yes, it is. But once you understand the rhythm, phase one becomes a weirdly satisfying dance.
Phase Two
When all five lanterns are destroyed, you finally get a clear shot at the Father of the Flame's core. But don't get comfortable.
Phase two opens with the boss casting a stream of fireballs. Drop to the floor and move carefully between the gaps. You don't want to be airborne here because you'll get clipped.
Once the fireball stream stops, you have a window to hop up and attack the core. Wisps still spawn regularly, so keep an eye on their positions and use your double jump to evade them while staying on the offensive.
The boss will start the fireball attack again after a few wisps leave the field, so watch for that tell and get to the ground early. In the air, you're a sitting duck.
Finally, when the battle ends, stand clear of the boss's last explosion. It can happen after you think you've won, and if it kills you, you'll have to do the whole fight over again. Give yourself some distance, and you'll walk away with the win.
Reward For Defeating The Father of the Flame
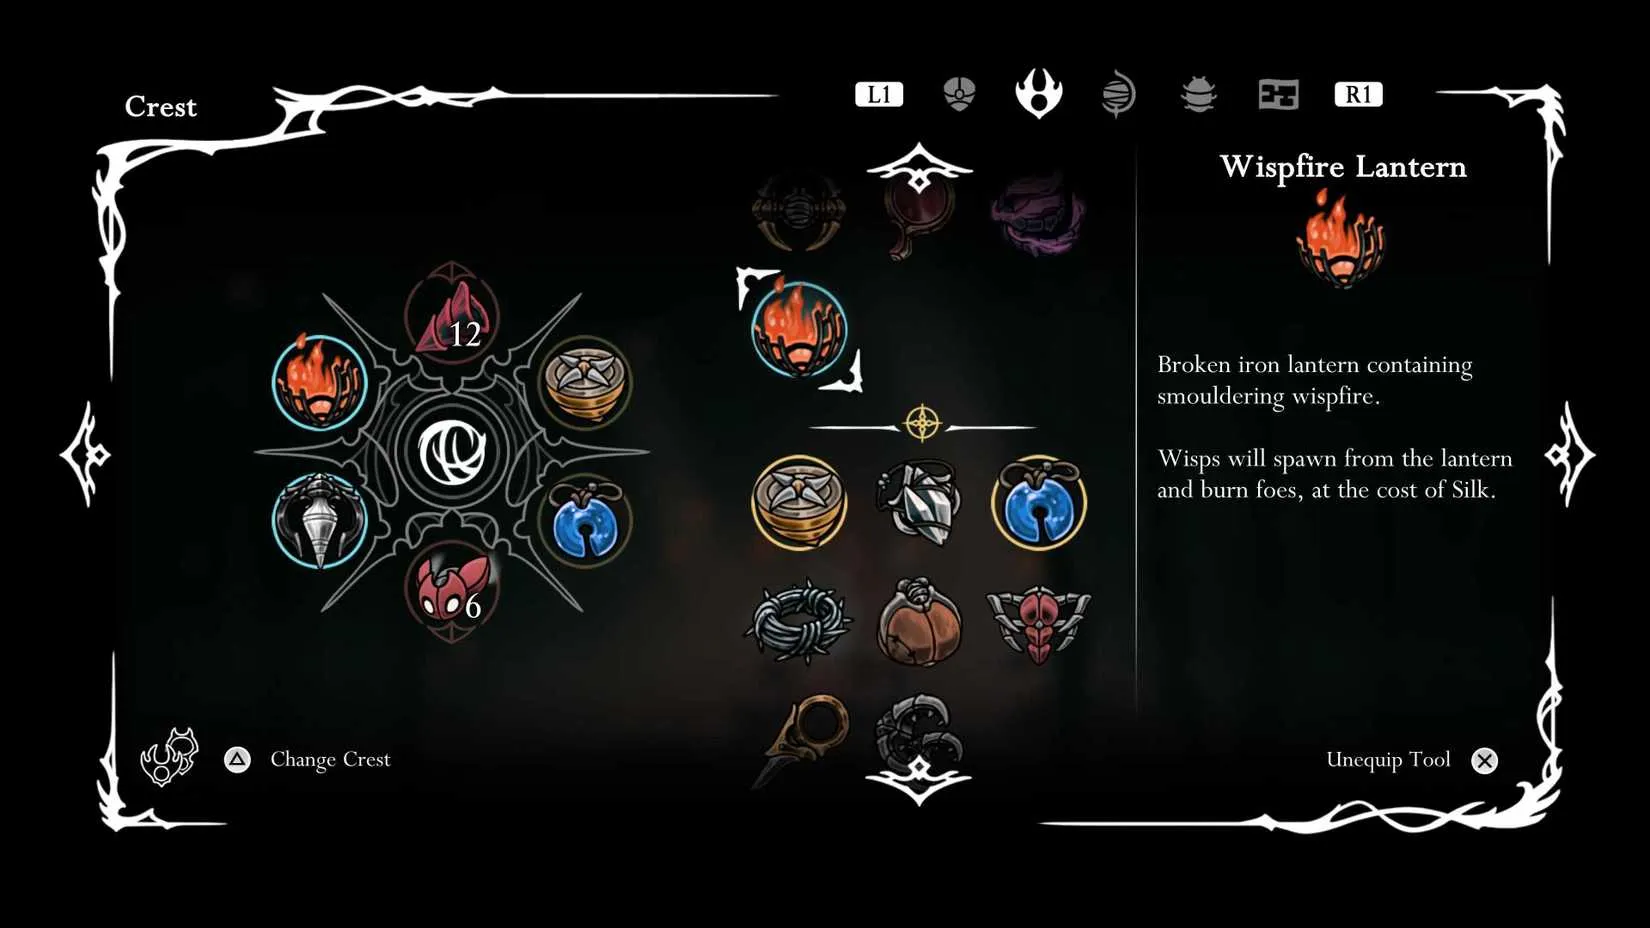
Once this fiery customer goes down, you'll pick up the Wispfire Lantern. This passive tool uses your silk to automatically summon a wisp that acts like a homing missile, attacking nearby enemies for you.
It's a fun tool, but it has a real trade-off. Because it constantly spends your silk on offensive projectiles, healing becomes much less consistent. If you rely on silk buildup for regular heals, you might want to skip this one. But if you play aggressively and like tools that keep the pressure on enemies, the Wispfire Lantern burns brighter than most.
So that's the Father of the Flame. It's a gimmick fight done right, at least for players who enjoy pogo combat. Stay mobile, stay calm, and don't let those wisps dictate your rhythm. Good luck out there in Pharloom!
Now that you've conquered the Father of the Flame, you might be hungry for more challenges that demand tight movement, quick reflexes, and that satisfying "one more try" mentality. Games built around precise combat and exploration don't come around often, and when one clicks with you, it's hard to put down.
If you're looking to expand your library without stretching your budget, it's worth keeping an eye on game deals today to see what else might be waiting for you. You never know when a similarly punishing but rewarding adventure will go on sale, ready to test your skills just as thoroughly as this fiery encounter did.
|
|
|
|
| Rescuing Sherma in Hollow Knight: Silksong's Balms for the Wounded |
|
Gönderen: xtameembb - 21-08-2026, 11:13:53 - Forum: İlim
- Yanıt Yok
|
|
Hollow Knight: Silksong's journey through Pharloom is packed with grim dangers, but few hit harder than the thought of sweet Sherma wandering into the shadows. The little bean is pure as snow, and when he goes missing, it is time to ride at dawn. The quest Balms for the Wounded turns his noble errand for bandages into a full-blown rescue operation. Hornet will need to cross Bone Bottom, ring the Songclave bell, snag a White Key, and dive deep into the steam-choked corridors of Whiteward to pull him out of trouble. Here is the full route, laid out step by step.
Prerequisites: Setting the Stage
Before Sherma will even think about showing up at Songclave, two big doors need to be kicked open. Missing either one is a classic run-killer, so it is worth double-checking the map before tearing hair out.
Requirement
Location
Why It Matters
Open the shortcut gate at The Marrow connection
Bone Bottom
Lets Sherma's travel route open up
Defeat Last Judge and open the Grand Gate door
Blasted Steps
Required for the journey to progress
Along the way, Hornet can bump into Sherma in a handful of spots. These meetings are not strictly required, but they add some sweet context and keep an eye on the precious bean. The known locations are in front of the Bell Beast while it is trapped, Pilgrim's Rest, Bellhart, the Blasted Steps bench, and the Citadel Spa.
Unlocking the Quest at Songclave
Once Hornet reaches Songclave and rings the bell to bring forth travelers, Sherma will eventually wander in—provided those earlier prerequisites are done and dusted. The first chat is pretty quiet, but the trick is to keep coming back and talking to him over time. Eventually Sherma starts voicing doubts about the travel, and not long after, he leaves Songclave altogether. His Wish will pop up on the Wishboard, and accepting it is the official start of the rescue.
Before charging off into Whiteward, there is one small but critical item: the White Key. On the right side of Songclave, it sits against the metal fence on the ground. Picking it up is non-negotiable, since without it the entrance to Whiteward might as well be a brick wall.
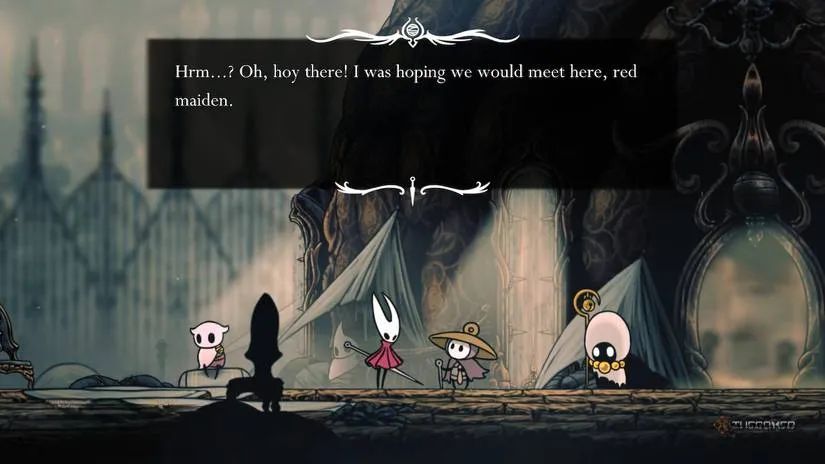
Finding Sherma in Whiteward
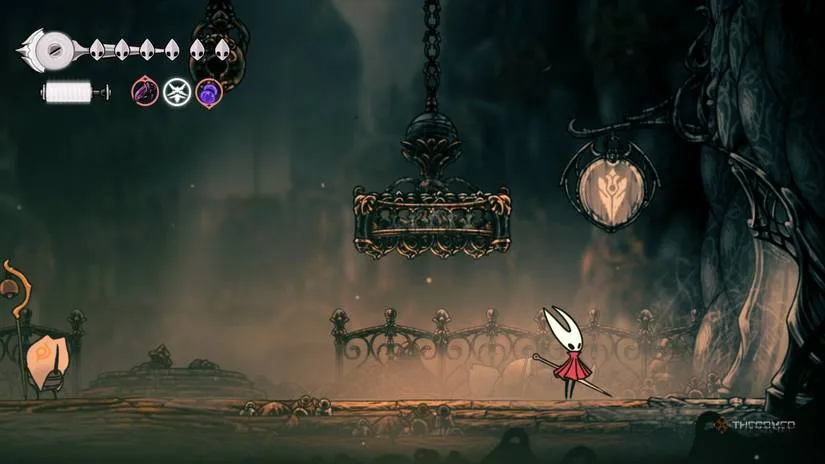
Whiteward is not the kind of place for a casual stroll. The path is long, dark, and full of things that want Hornet dead. The first entry starts at the Grand Bellway station. From there, Hornet should enter the chamber to the left, take the second exit from the bottom left, and push through the long chamber all the way into the far room. On the bottom right, the entrance to Whiteward is marked with an upside-down spear sign. The White Key unlocks the elevator that leads down into the area.
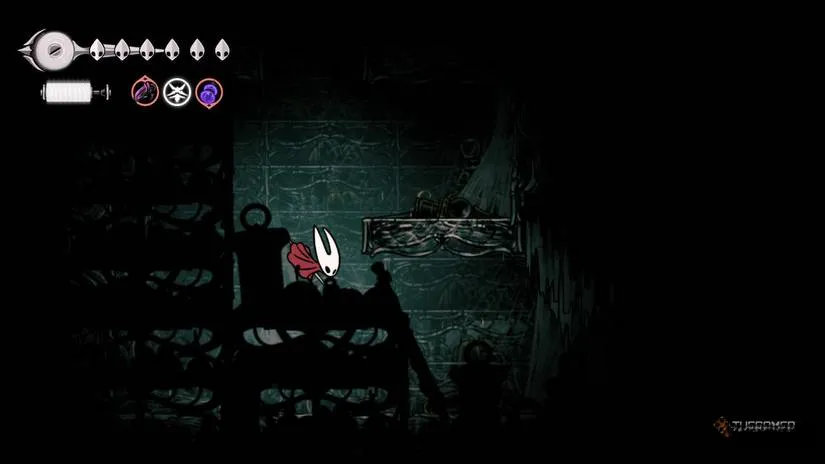
After taking the elevator all the way down, Hornet should travel hard left, passing the key slot. On the far side, a set of platforms leads up into a narrow upper tunnelway. Keep climbing into the next room and up until the path turns into a corridor full of steam vents. Dashing through those vents takes care, but the real headache is the vertical path ahead. Hornet can jump up and to the right, but two circling fans are waiting to turn a clean jump into a pancake.
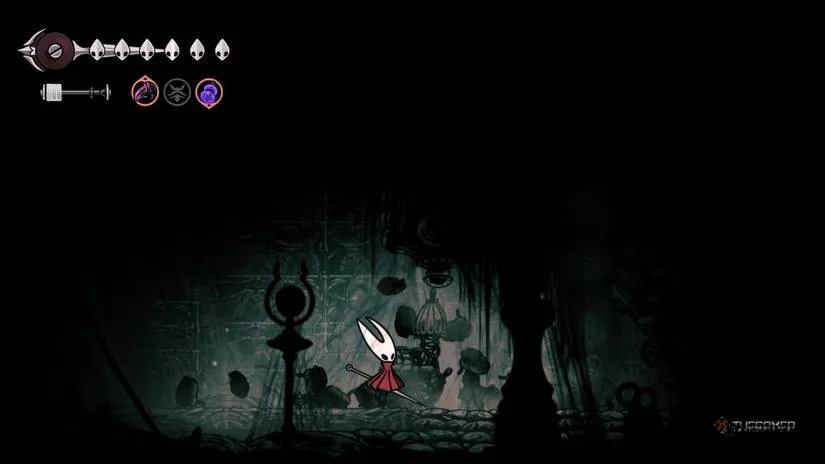
Eventually the route dead-ends at a lever. Striking it opens a path down, so Hornet should fall into the new room and start heading right, breaking any false walls along the way. Past the elevator shaft, a grate on the far side must be destroyed to continue left, then it is time to drop down. At the bottom sits the Whiteward Map, available for 70 Rosary. The map is a handy pickup for anyone who does not enjoy wandering blind, but the goal is still further right.
To the right of the Whiteward Map dispenser begins Sherma's trail. Hornet should follow it right, past the mortician enemies, until reaching the end of the room. From there, a platform leads up into the room above. Following Sherma's scent left over the spikes reveals a building with bells on either side of the entrance. That is the hideaway.
Saving Sherma: The Ambush
Inside the building, Sherma is tucked away at the back. He is hiding behind a false wall, so Hornet must destroy it to reveal his hidden room. A quick chat with the little bean kicks off the real fight—morticians and surgeons pour in, and Hornet is not out of the woods until every single one is cleared out.
This ambush can get ugly fast, but a few tricks make it far more manageable:
Throw down traps like Tacks and Sting Shards; the Pollip Pouch tool makes these even more effective.
Use Cross Stitch against morticians to punish their aggressive rush and hit multiple enemies at once.
Turn the sound up. Movement in the dark or offscreen is easier to track by sound than by squinting at shadows.
Do not let the surgeons surround Hornet. Jumping over or around them keeps the fight from turning into a corner trap.
Always target morticians before surgeons. Clearing the fast ones first opens up more ground to maneuver.

Once the last wave drops, Hornet should talk to Sherma again. He hands over a Spool Fragment and the quest completes. Best of all, Sherma will return to Songclave on his own after Hornet leaves the building and rests—no escort mission required. He will be safe and sound, with some new dialogue about the used bandages. For now, that is all any player can do to keep the sweetest bean in Pharloom out of harm's way.
Seeing Sherma safe and sound back in Songclave is one of those quiet payoffs that makes exploring every corner of Whiteward worthwhile. It is a small, self-contained story that rewards careful play, and it is exactly the kind of content that keeps players coming back for more. Those moments of closure are what make the journey through Pharloom feel so memorable.
For anyone still working through the area or planning another run, keeping the game itself in mind is just as important. Prices for popular titles like this one can swing wildly between stores and seasons, so it pays to check game prices at DealNest before making a purchase. A little comparison shopping can go a long way, leaving more room in the budget for the next big adventure.
|
|
|
|
| Hell Is Us Director Calls Silksong Shadow Drop 'A Little Callous' |
|
Gönderen: xtameembb - 21-08-2026, 07:59:19 - Forum: İlim
- Yanıt Yok
|
|
When Team Cherry finally lifted the curtain on Hollow Knight: Silksong’s release date, the indie world didn’t just sit up—it scrambled. After seven years of waiting, players had exactly two weeks to prepare. But while fans celebrated, a wave of developers quietly opened their calendars and did some panicked arithmetic. One of those developers, Jonathan Jacques-Belletête, director of Hell Is Us, has now described the last-minute announcement as “a little callous.”
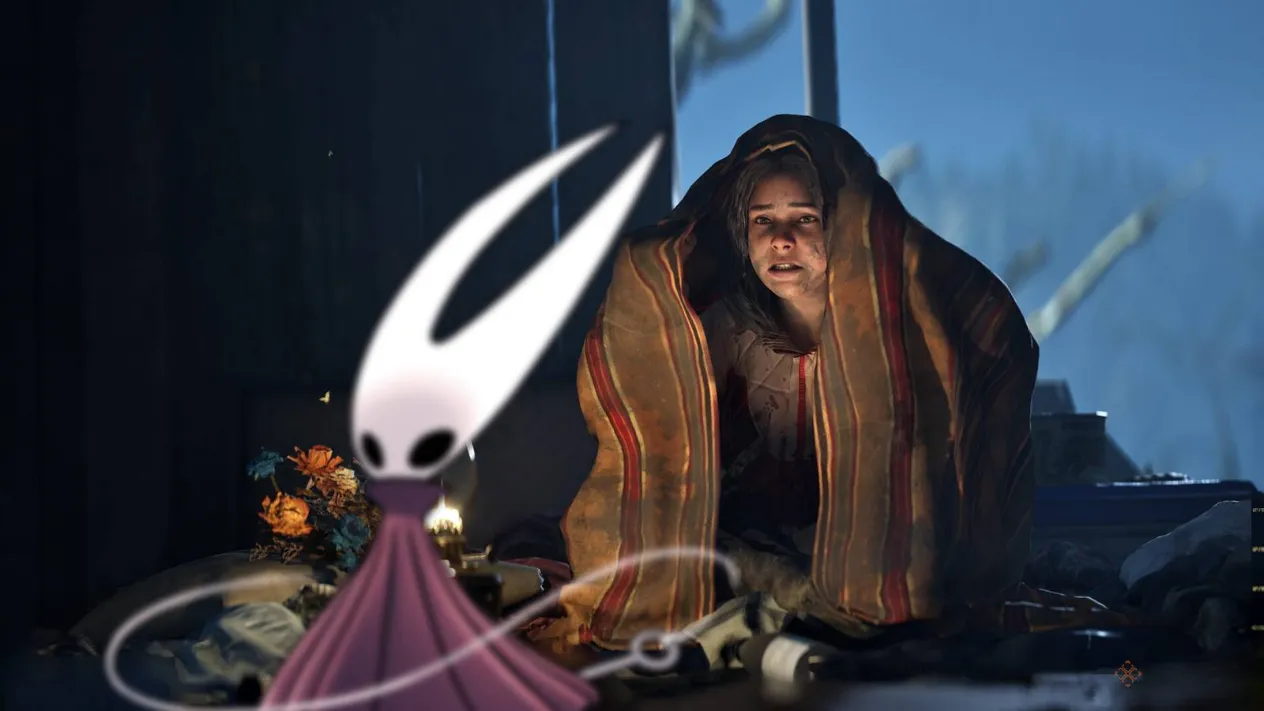
Speaking on the Friends Per Second podcast, Jacques-Belletête did not mince words about the way the Silksong release date landed. He called the shadow drop a bold move from a studio that must have known its gravitational pull. “When you know you’re that big, I think a shadow drop is a bit like, wow,” he said. “As the ‘GTA 6 of indie’… to shadow drop something like this is a little callous.”
The issue wasn’t the quality of Silksong—it was the timing. Hell Is Us and Hollow Knight: Silksong both launched on September 4, 2025. A game of Silksong’s size getting a two-week warning left other studios scrambling. Some smaller teams moved their release dates to avoid the collision, a luxury not every project could afford.

Jacques-Belletête acknowledged that Team Cherry had every right to pick its date, but the fallout was uneven. “We’re still much bigger than some of the smaller ones who would have gotten a lot more affected and who decided to change their dates,” he explained. “Changing the date of Hell Is Us would have been a pretty big endeavour.” Marketing plans, retail coordination, and months of build-up would have been thrown into disarray. For a studio the size of Rogue Factor, shifting a launch at the eleventh hour was not just a matter of flipping a calendar page—it was a logistical sinkhole.
The numbers told a brutal story. While Silksong vacuumed up attention, Hell Is Us still managed to peak at nearly 5,000 concurrent players during its launch weekend. That might sound modest, but compare it to Atari’s Adventure of Samsara, a metroidvania that also launched on September 4, 2025. Its peak concurrent player count sat at 15. Fifteen. That is not a typo. The game had the misfortune of sharing a birthday with one of the most anticipated indie sequels in history, and it paid the price.
Other indie titles saw the writing on the wall and got out of Dodge. Baby Steps, Demonschool, and several smaller projects shifted their dates rather than face the Silksong steamroller. In hindsight, that looked like the smart play. No amount of goodwill could compete with a shadow-dropped juggernaut.
Game
Release Decision
Outcome
Hell Is Us
Held its ground
Peaked near 5,000 concurrent players
Adventure of Samsara
Held its ground
Peaked at 15 concurrent players
Baby Steps / Demonschool
Moved
Avoided a direct launch collision
Looking back from 2026, the whole episode remains a case study in how one big announcement can send shockwaves through the indie ecosystem. Jacques-Belletête does not seem bitter—he is happy the team stuck to its guns. But he also does not sugarcoat the reality: when a game as massive as Silksong appears out of nowhere, the little guys have to make impossible choices. Some dodge. Some hold the line. And some, like Adventure of Samsara, simply get caught in the blast radius.
The director’s “callous” comment may ruffle feathers, but it names a real tension in the industry. There is no rule that says a giant must give smaller studios breathing room. Yet for developers who spent years polishing their games, a two-week notice can feel like showing up to a knife fight only to find the other guy brought a tank. In the end, Hell Is Us survived the collision, but the scars—and the what-ifs—remain.
For players, the silver lining of these overcrowded launch windows is that smart spending has never been more important. With so many releases landing on the same day—and with some of them vanishing into obscurity within hours—savvy shoppers have learned to wait, compare, and strike when the price is right. Whether it's a hidden gem that got swept up in a bigger launch or a AAA title that slipped under the radar, there's no shame in holding out for a better deal before making the call.
That's where a little patience pays off. Instead of paying full price for games that might drop in value just weeks later, seasoned players turn to price-tracking tools and storefront aggregators to find the best deal across the platforms they trust. In an industry where timing can mean the difference between a hit and a footnote, waiting for the right moment to buy is sometimes the smartest move a player can make—especially once the steamroller has already passed.
|
|
|
|
| All Main Story Quests and Wishes in Hollow Knight Silksong |
|
Gönderen: xtameembb - 21-08-2026, 06:36:43 - Forum: İlim
- Yanıt Yok
|
|
Hollow Knight: Silksong structures its adventure through a layered system of main story quests and optional Wishes, guiding players across the vast kingdom of Pharloom. The campaign is divided into three acts, and across those acts the game contains a total of 21 main story quests. However, a player will only be able to complete at most 20 of these quests during a single playthrough. This restriction is linked to a branching point that is highlighted by the asterisk placed next to the Soul Snare quest. Players who aim for the regular ending can conclude the journey after finishing only nine main story quests.

The complete set of main story quests in Hollow Knight: Silksong is recorded below. These quests form the backbone of Hornet's journey through the game's regions and narrative beats.
#
Main Story Quest
1
The Great Citadel
2
The Threadspun Town
3
Grand Gate
4
Silent Halls
5
Pharloom's Crown
6
Conductor's Melody
7
Vaultkeeper's Melody
8
Architect's Melody
9
Pale Monarch
10
Soul Snare *
11
After The Fall
12
Awaiting the End
13
Beast in the Bells
14
The Dark Below
15
Return to Pharloom
16
Spell Seeker
17
The Old Hearts
18
Heart of Might
19
Heart of the Woods
20
Heart of the Wild
21
Last Dive
The main story quests carry Hornet through a wide range of environments and objectives. Several quests follow a clear thematic chain, such as the trio of melodies connected to the Conductor, the Vaultkeeper, and the Architect. Later entries focus on the Old Hearts and a sequence of four Heart quests, which point toward Pharloom's deeper mysteries and the hidden forces shaping the kingdom. The final main quest, Last Dive, serves as the closing narrative step for runs that unlock its full path.
Beyond the main story, Hollow Knight: Silksong includes 54 side quests known as Wishes. These Wishes are optional for reaching the regular ending, but they become essential for players who want to see everything the game has to offer. To unlock the third act and experience the true ending, a fairly large number of Wishes must be completed. Likewise, players who hope to achieve 100% completion will need to clear every available main quest and every Wish.
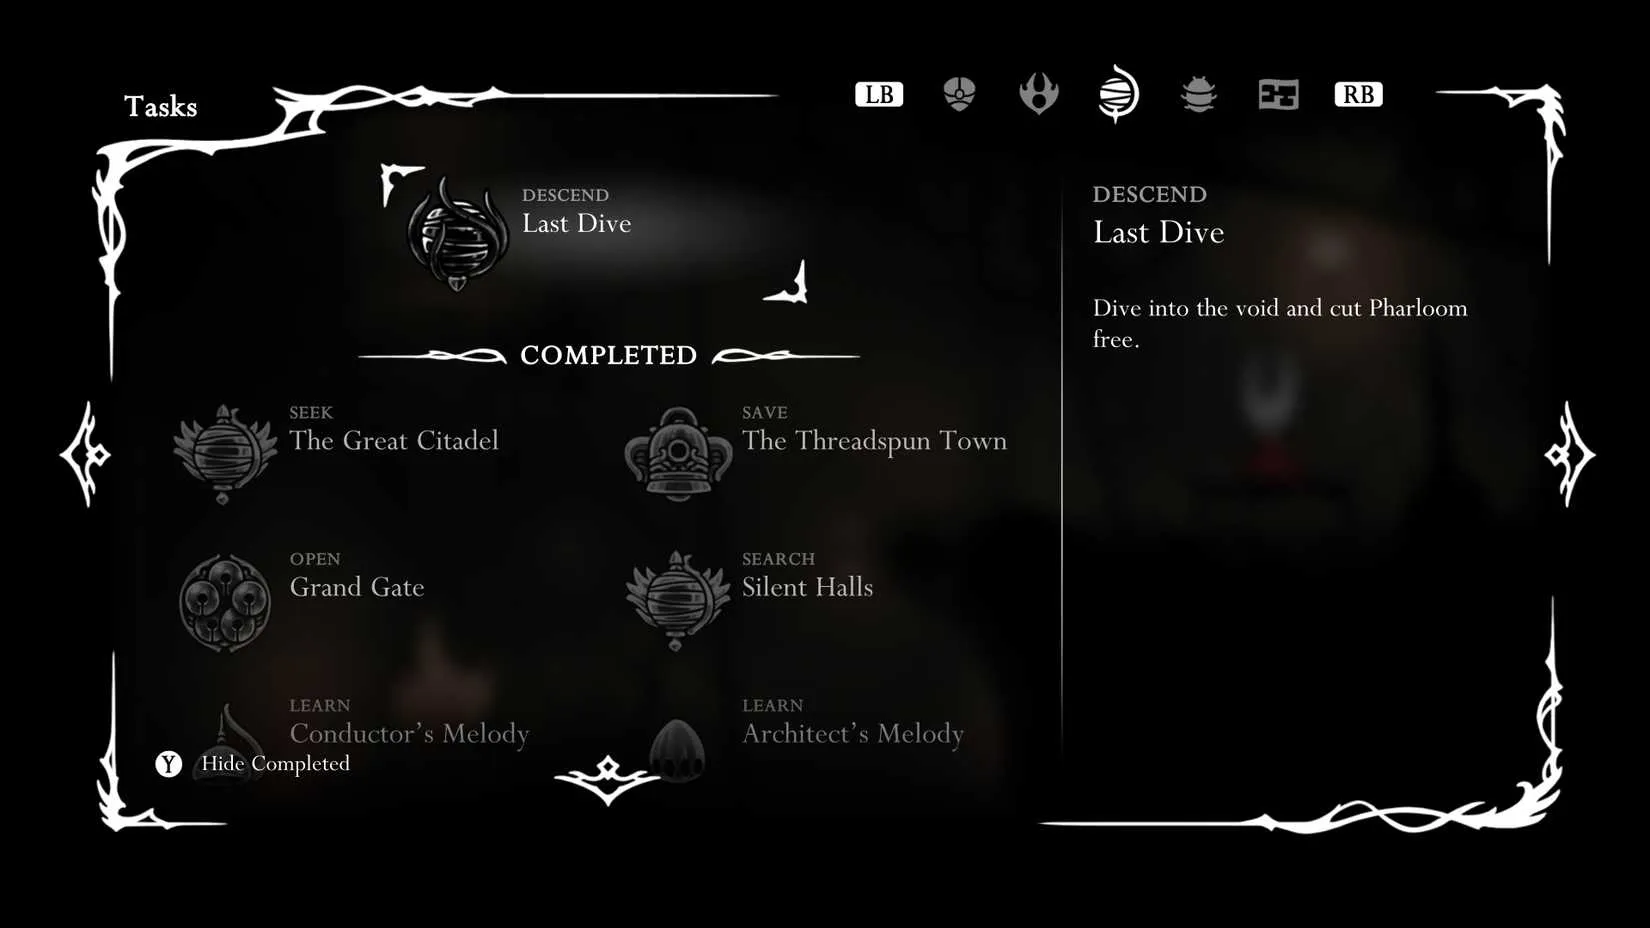
The completion thresholds in Hollow Knight: Silksong can be summarized as follows:
? Regular ending: complete 9 main story quests
? True ending: complete all three acts and a substantial portion of the 54 Wishes
✅ 100% completion: complete all available main story quests and all 54 Wishes
The asterisk attached to Soul Snare is a notable detail for completionists. Because of this special case, a single run can only include 20 of the 21 main story quests. This means that seeing every quest in the game may require careful routing or a second playthrough with different choices. The Wishes add another layer of depth by rewarding exploration, NPC interactions, and optional challenges scattered throughout Pharloom. For players who want the full Hollow Knight: Silksong experience, tracking both the main quests and the Wishes is just as important as mastering Hornet's combat and movement abilities.
With such a dense list of objectives, it is no surprise that many players plan their entire playthrough well in advance. Between the main quests, the Wishes, and the special routing required for the Soul Snare quest, Hornet's journey through Pharloom can easily stretch to dozens of hours. Whether you are diving in for the first time or preparing for a completionist run, being sure you have the right version of the game is just as important as knowing every questline.
For anyone still deciding where to pick up Hollow Knight: Silksong, it is worth checking a few retailers before committing. Prices can vary across platforms and regional stores, and a quick search may save you a little extra that you can put toward future DLC or other indie gems. If you want to make the most of your budget, you can compare prices here before your journey to Pharloom begins.
|
|
|
|
| Hollow Knight Silksong Surpasses Metroid Sales Records in Record Time |
|
Gönderen: xtameembb - 20-08-2026, 20:52:11 - Forum: İlim
- Yanıt Yok
|
|
In the sprawling, often unpredictable landscape of indie gaming, few stories feel as remarkable as the continued rise of Team Cherry. The original Hollow Knight, a hauntingly beautiful hand-drawn adventure through the forgotten kingdom of Hallownest, was already an unprecedented success, selling over 15 million copies worldwide. Given that massive footprint, it is hardly surprising that its long-awaited sequel, Hollow Knight: Silksong, is shattering records of its own. Yet, the scale of that achievement is still genuinely staggering. Could anyone have predicted that a studio consisting of just three developers would one day eclipse the lifetime sales of an entire legendary franchise entry in under a month?

According to estimates from GDCo, the performance of Silksong since its 2025 launch has been nothing short of meteoric. In less than a month, the title reportedly moved 3.2 million copies on Steam alone, with an additional 500,000 copies sold on both the Nintendo Switch and PlayStation platforms respectively. While these figures do not account for Xbox sales, largely due to the complexity introduced by the Game Pass subscription service, the combined estimated total of 4.2 million units is enough to place Silksong firmly above the best-selling game in the Metroid series. This is a particularly poetic turn of events, especially considering how often the Hollow Knight franchise has been compared to Nintendo’s iconic space-faring bounty hunter series.
How Hollow Knight Sales Compare To Metroid
The comparison between these two titans of the Metroidvania genre highlights just how dramatically the landscape has shifted. After years of anticipation and silence from Team Cherry, the release of Silksong felt less like a standard game launch and more like a cultural event, one that was powerful enough to crash entire storefronts. The numbers paint a vivid picture of this dominance.
Game
Copies Sold
Hollow Knight
15 million
Hollow Knight: Silksong
Estimated 4.2 million
Metroid Dread
3.07 million
Metroid Prime
2.8 million
Metroid
2.73 million
The trajectory here is astonishing. With only two games under its belt, the Hollow Knight series has amassed roughly 19.2 million copies sold. To put that into perspective, that figure is dangerously close to the lifetime sales of the entire Metroid franchise, which sits at approximately 22.6 million units across numerous entries spanning decades. When considering that Silksong launched with a remarkably accessible $20 price tag, one cannot help but ask: did the low barrier to entry create a perfect storm for one of the most profitable indie launches of the decade?

The financial implications of these sales figures are as breathtaking as the game’s intricate level design. Based on the aforementioned sales data, GDCo speculates that Silksong has generated over $50 million in revenue from Steam alone for Team Cherry. For a studio of just three developers to achieve such a return is a testament not only to the quality of the product but to the power of dedicated fan communities. In an era where blockbuster budgets often reach hundreds of millions, Silksong stands as a beacon of what can be achieved with artistic vision, tight mechanics, and patience.
Suffice to say, Silksong has established itself as one of the biggest hits of the year. The gap between it and its contemporaries is vast. Other indie Metroidvanias, such as the cyberpunk-styled Bladechimera, do not come close to matching this success, reportedly reaching just one percent of Silksong’s purported sales. This disparity raises an interesting question about the current state of the genre: is there a ceiling for how much success an indie game can achieve, or has Team Cherry simply redefined the boundary entirely?

However, the story of this rivalry is far from over. While Silksong currently rules the roost, a similar narrative could be brewing at Nintendo. The company has a project that has likewise been in development for nearly a decade, leaving fans on tenterhooks with very little in the way of updates. That title is none other than Metroid Prime 4, which finally has a release date set for December 4, 2026. The anticipation surrounding the game is immense. While the previous remaster of the original Metroid Prime, which was shadow-dropped during a Direct presentation, performed modestly by comparison—selling just over 1.3 million copies and failing to match the success of Metroid Dread—the situation for a brand new, mainline sequel is entirely different.
With a massive marketing budget, years of pent-up anticipation, and the allure of a new handheld platform like the Switch successor driving hardware sales, Metroid Prime 4 could prove to be a much bigger hit than its predecessors. The landscape in 2026 is ripe for a resurgence of the classic franchise, but catching up to the lightning-in-a-bottle success of Silksong will be a monumental task. Time will tell if Nintendo can narrow the gap, but for now, the Hollow Knight franchise stands tall, proving that in the modern gaming era, the size of the team matters far less than the size of the world they dare to create.
Regardless of future outcomes, the current reality is undeniable: Silksong has rewritten the rulebook for indie success, and it has done so by outselling the very legends that inspired it. Will the next chapter belong to Samus Aran, or will Hornet continue to reign supreme? The answer, like the winding corridors of Phaaze or the depths of Hallownest, remains shrouded in mystery.
For fans eagerly awaiting these massive releases, the wait can feel like an eternity. Whether you're planning to secure a copy of Metroid Prime 4 on day one or hoping to revisit Hallownest on a new platform, the smartest players are already thinking ahead about how to get the best possible price. With new game launches frequently varying across retailers—sometimes by tens of dollars—it pays to stay vigilant rather than paying full sticker price on release day. Many savvy gamers have turned to this price tracking tool to monitor fluctuations across major stores, ensuring they never miss a meaningful discount on the titles they care about most.
The same patience that has defined the long development cycles of these franchises can also define how you approach your purchases. Just as Team Cherry and Nintendo have refined their craft over years, a little diligence in tracking deals can reward you with significant savings when the time finally comes to dive in. After all, the journey toward these legendary experiences is part of the fun—and being prepared financially only makes the eventual payoff that much sweeter.
|
|
|
|
|